溫馨提示×
您好,登錄后才能下訂單哦!
點擊 登錄注冊 即表示同意《億速云用戶服務條款》
您好,登錄后才能下訂單哦!
本篇內容主要講解“Python如何實現數字圖像處理染色體計數”,感興趣的朋友不妨來看看。本文介紹的方法操作簡單快捷,實用性強。下面就讓小編來帶大家學習“Python如何實現數字圖像處理染色體計數”吧!
對于下面這幅圖像,編程實現染色體計數,并附簡要處理流程說明。
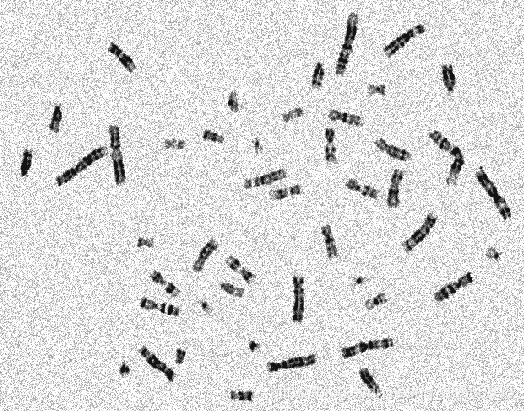
1.中值濾波
2.圖像二值化
3.膨脹圖像
4.腐蝕圖像
5.計算光影背景
6.移除背景
7.檢測染色體
import cv2
import numpy as np
# 計算光影背景
def calculateLightPattern(img4):
    h, w = img4.shape[0], img4.shape[1]
    img5 = cv2.blur(img4, (int(w/3), int(w/3)))
    return img5
# 移除背景
def removeLight(img4, img5, method):
    if method == 1:
        img4_32 = np.float32(img4)
        img5_32 = np.float32(img5)
        ratio = img4_32 / img5_32
        ratio[ratio > 1] = 1
        aux = 1 - ratio
        # 按比例轉換為8bit格式
        aux = aux * 255
        aux = np.uint8(aux)
    else:
        aux = img5 - img4
    return aux
def ConnectedComponents(aux):
    num_objects, labels = cv2.connectedComponents(aux)
    if num_objects < 2:
        print("connectedComponents未檢測到染色體")
        return
    else:
        print("connectedComponents檢測到染色體數量為:", num_objects - 1)
    output = np.zeros((aux.shape[0], aux.shape[1], 3), np.uint8)
    for i in range(1, num_objects):
        mask = labels == i
        output[:, :, 0][mask] = np.random.randint(0, 255)
        output[:, :, 1][mask] = np.random.randint(0, 255)
        output[:, :, 2][mask] = np.random.randint(0, 255)
    return output
def ConnectedComponentsStats(aux):
    num_objects, labels, status, centroids = cv2.connectedComponentsWithStats(aux)
    if num_objects < 2:
        print("connectedComponentsWithStats未檢測到染色體")
        return
    else:
        print("connectedComponentsWithStats檢測到染色體數量為:", num_objects - 1)
    output = np.zeros((aux.shape[0], aux.shape[1], 3), np.uint8)
    for i in range(1, num_objects):
        mask = labels == i
        output[:, :, 0][mask] = np.random.randint(0, 255)
        output[:, :, 1][mask] = np.random.randint(0, 255)
        output[:, :, 2][mask] = np.random.randint(0, 255)
    return output
def FindContours(aux):
    contours, hierarchy = cv2.findContours(aux, cv2.RETR_EXTERNAL, cv2.CHAIN_APPROX_SIMPLE)
    if len(contours) == 0:
        print("findContours未檢測到染色體")
        return
    else:
        print("findContours檢測到染色體數量為:", len(contours))
    output = np.zeros((aux.shape[0], aux.shape[1], 3), np.uint8)
    for i in range(len(contours)):
        cv2.drawContours(
            output,
            contours,
            i,
            (np.random.randint(0, 255),
             np.random.randint(0, 255),
             np.random.randint(0, 255)), 2)
    return output
# 讀取圖片
img = cv2.imread('img.png', 0)
pre_img = cv2.cvtColor(img, cv2.COLOR_BGR2RGB)  # 二值化函數
# 第一步:中值濾波
# 中值濾波
img1 = cv2.medianBlur(img, 3)
# 顯示并保存圖片
cv2.imshow('gray', img)
cv2.imshow('medianBlur', img1)
cv2.imwrite('medianBlur.jpg', img1)
# 第二步:圖像二值化
# 圖像二值化
ret, img2 = cv2.threshold(img1, 140, 255, 0, img1)  # 二值化函數
# 顯示并保存圖片
cv2.imshow('threshold', img2)
cv2.imwrite('threshold.jpg', img2)
# 第三步:膨脹圖像
dilate_kernel = np.ones((3, 3), np.uint8)
img3 = cv2.dilate(img2, dilate_kernel)
# 顯示并保存圖片
cv2.imshow('dilate', img3)
cv2.imwrite('dilate.jpg', img3)
# 第四步:腐蝕圖像
erode_kernel = np.ones((7, 7), np.uint8)
img4 = cv2.erode(img3, erode_kernel)
# 顯示并保存圖片
cv2.imshow('erode', img4)
cv2.imwrite('erode.jpg', img4)
# 第五步:計算光影背景
img5 = calculateLightPattern(img4)
# 顯示并保存圖片
cv2.imshow('LightPattern', img5)
cv2.imwrite('LightPattern.jpg', img5)
# 第六步:移除背景
aux = removeLight(img4, img5, 1)
# 顯示并保存圖片
cv2.imshow('removeLight', aux)
cv2.imwrite('removeLight.jpg', aux)
# 第七步:檢測輪廓
output1 = ConnectedComponents(aux)
output2 = ConnectedComponentsStats(aux)
output3 = FindContours(aux)
# 顯示并保存圖片
cv2.imshow('connectedComponents', output1)
cv2.imwrite('connectedComponents.jpg', output1)
cv2.imshow('connectedComponentsWithStats', output2)
cv2.imwrite('connectedComponentsWithStats.jpg', output2)
cv2.imshow('findContours', output3)
cv2.imwrite('findContours.jpg', output3)
cv2.waitKey(0)1.中值濾波
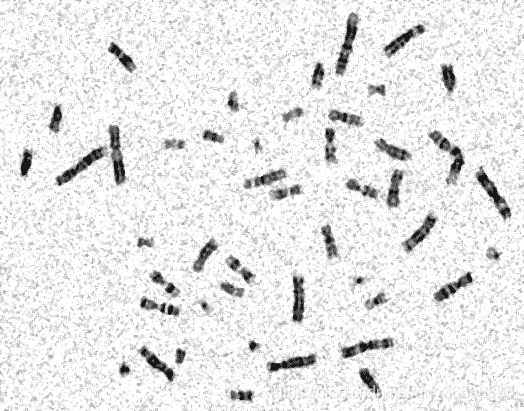
2.圖像二值化
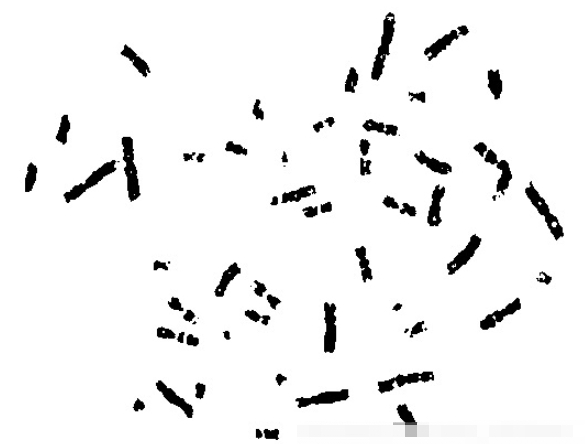
3.膨脹圖像

4.腐蝕圖像
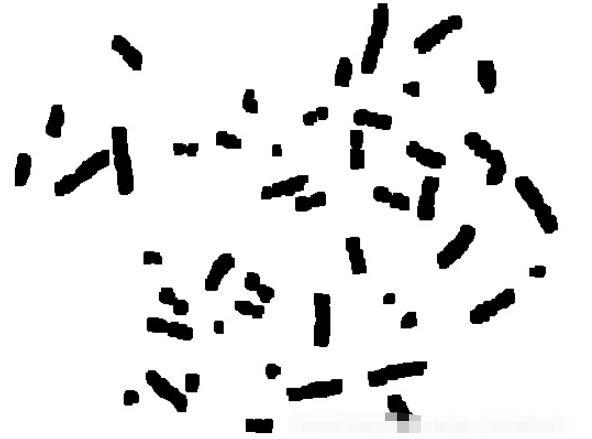
5.計算光影背景

6.移除背景
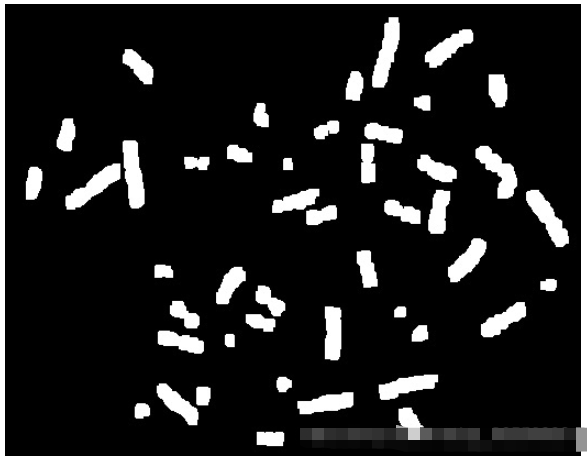
7.檢測染色體
(1)connectedComponents.jpg
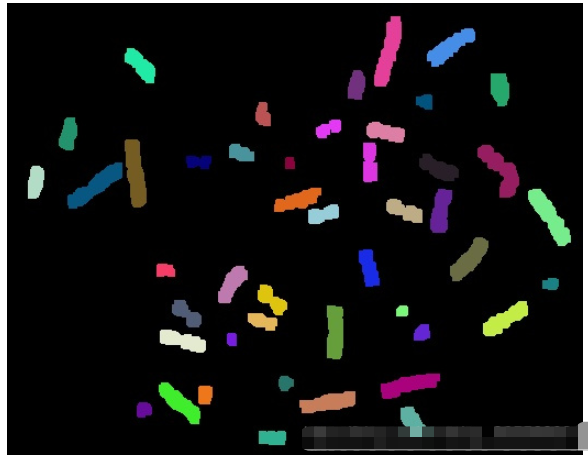
(2)connectedComponentsWithStats.jpg

(3)findContours.jpg
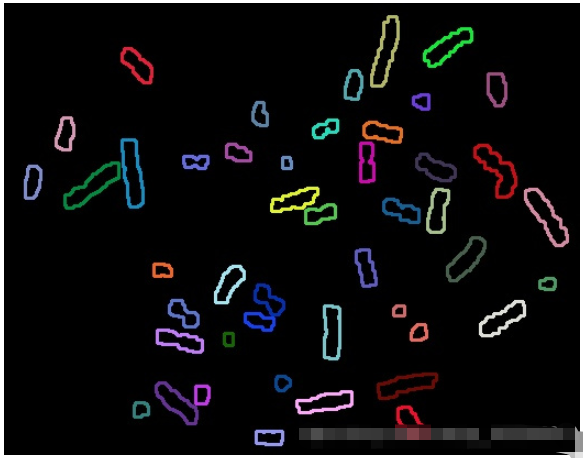
染色體個數為46
到此,相信大家對“Python如何實現數字圖像處理染色體計數”有了更深的了解,不妨來實際操作一番吧!這里是億速云網站,更多相關內容可以進入相關頻道進行查詢,關注我們,繼續學習!
免責聲明:本站發布的內容(圖片、視頻和文字)以原創、轉載和分享為主,文章觀點不代表本網站立場,如果涉及侵權請聯系站長郵箱:is@yisu.com進行舉報,并提供相關證據,一經查實,將立刻刪除涉嫌侵權內容。