您好,登錄后才能下訂單哦!
您好,登錄后才能下訂單哦!
這篇文章主要介紹使用CSS制作對話框氣泡的方法,文中介紹的非常詳細,具有一定的參考價值,感興趣的小伙伴們一定要看完!
我們在和別人通過微信或者qq聊天的時候都會有對話框氣泡,那么這個對話框氣泡是怎么實現的呢?
首先我們來看一下我們需要制作的對話框的效果
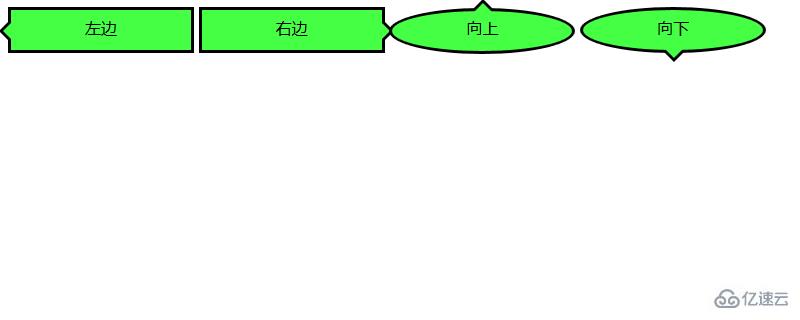
接下來我們就來看看這幾種對話氣泡的實現方法
我們來看一下如何實現箭頭向左的對話氣泡
我們需要先來制作一個框架
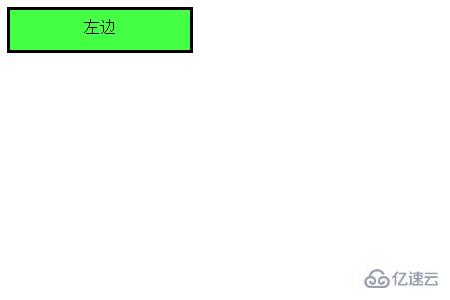
代碼如下
HTML代碼
<div class="balloon-left">
左邊
</div>
CSS代碼
 .balloon-left {
  position: relative;
  display: inline-block;
  padding: 0 15px;
  width: auto;
  min-width: 150px;
  height: 40px;
  line-height: 34px;
  text-align: center;
  background: #44FF44;
  border: 3px solid #000000;
  z-index: 0;
}
接著,我們使用:before來制作箭頭部分,用:after來制作箭頭的邊
CSS代碼
.balloon-left:before {
  border-style: solid;
  border-width: 10px 10px 10px 0;
  border-color: transparent #44FF44 transparent transparent;
  content: "";
  position: absolute;
  top: 50%; left: -8px;
  margin-top: -9px;
  display: block;
  width: 0px;
  height: 0px;
  z-index: 0;
}
.balloon-left:after {
  border-style: solid;
  border-width: 11px 11px 11px 0;
  border-color: transparent #000000 transparent transparent;
  content: "";
  position: absolute;
  top: 50%; left: -12px;
  margin-top: -10px;
  display: block;
  width: 0px;
  height: 0px;
  z-index: -1;
}
運行效果入下所示
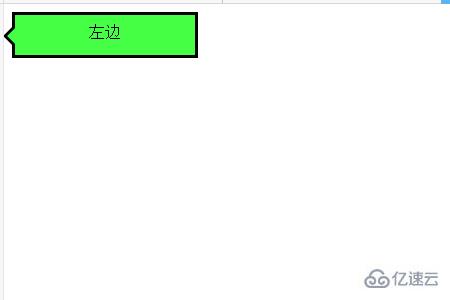
這樣就完成了第一個對話氣泡
下面我們就來根據上述方法來制作箭頭向右的對話氣泡
代碼如下
HTML代碼
<div class="balloon-right">
  右邊
</div>
CSS代碼
.balloon-right {
  position: relative;
  display: inline-block;
  padding: 0 15px;
  width: auto;
  min-width: 150px;
  height: 40px;
  line-height: 34px;
  text-align: center;
  background: #44FF44;
  border: 3px solid #000000;
  z-index: 0;
}
.balloon-right:before {
  border-style: solid;
  border-width: 10px 0 10px 10px;
  border-color: transparent transparent transparent #44FF44;
  content: "";
  position: absolute;
  top: 50%; right: -8px;
  margin-top: -9px;
  display: block;
  width: 0px;
  height: 0px;
  z-index: 0;
}
.balloon-right:after {
  border-style: solid;
  border-width: 11px 0 11px 11px;
  border-color: transparent transparent transparent #000000;
  content: "";
  position: absolute;
  top: 50%; right: -12px;
  margin-top: -10px;
  display: block;
  width: 0px;
  height: 0px;
  z-index: -1;
}
運行上述代碼的效果如下所示:是一個向右的氣泡
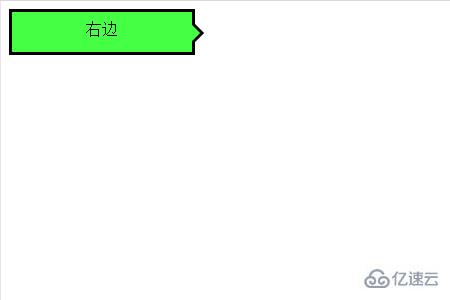
最后我們來說箭頭向左和向右的對話氣泡
我們需要用到border-radius屬性讓氣泡變得圓滑
代碼如下
HTML代碼
<div class="balloon-top">向上</div>
  <div class="balloon-bottom">向下</div>
CSS代碼
.balloon-top {
  position: relative;
  display: inline-block;
  padding: 0 15px;
  width: auto;
  min-width: 150px;
  height: 40px;
  line-height: 32px;
  text-align: center;
  background: #44FF44;
  border: 3px solid #000000;
  z-index: 0;
  border-radius: 60%;
}
.balloon-top:before {
  border-style: solid;
  border-width: 0 10px 10px 10px;
  border-color: transparent transparent #44FF44 transparent;
  content: "";
  position: absolute;
  top: -8px; left: 50%;
  margin-left: -9px;
  display: block;
  width: 0px;
  height: 0px;
  z-index: 0;
}
.balloon-top:after {
  border-style: solid;
  border-width: 0 11px 11px 11px;
  border-color: transparent transparent #000000 transparent;
  content: "";
  position: absolute;
  top: -12px; left: 50%;
  margin-left: -10px;
  display: block;
  width: 0px;
  height: 0px;
  z-index: -1;
}
.balloon-bottom {
  position: relative;
  display: inline-block;
  padding: 0 15px;
  width: auto;
  min-width: 150px;
  height: 40px;
  line-height: 34px;
  text-align: center;
  background-color: #44FF44;
  border: 3px solid #000000;
  z-index: 0;
  border-radius: 60%;
}
.balloon-bottom:before {
  content: "";
  position: absolute;
  bottom: -8px; left: 50%;
  margin-left: -9px;
  width: 0px;
  height: 0px;
  border-style: solid;
  border-width: 10px 10px 0 10px;
  border-color: #44FF44 transparent transparent transparent;
  z-index: 0;
}
.balloon-bottom:after {
  border-style: solid;
  border-width: 11px 11px 0 11px;
  border-color: #000000 transparent transparent transparent;
  content: "";
  position: absolute;
  bottom: -12px; left: 50%;
  margin-left: -10px;
  width: 0px;
  height: 0px;
  z-index: -1;
}
效果如下所示
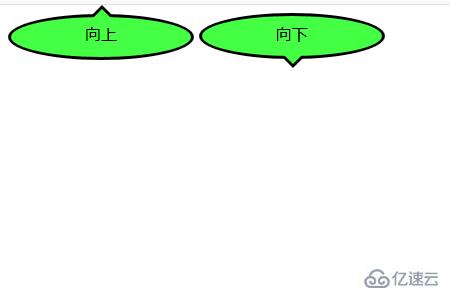
CSS部分有點復雜,但你可以根據以上示例通過自定義顏色和形狀來制作各種類型的對話框氣泡。
以上是使用CSS制作對話框氣泡的方法的所有內容,感謝各位的閱讀!希望分享的內容對大家有幫助,更多相關知識,歡迎關注億速云行業資訊頻道!
免責聲明:本站發布的內容(圖片、視頻和文字)以原創、轉載和分享為主,文章觀點不代表本網站立場,如果涉及侵權請聯系站長郵箱:is@yisu.com進行舉報,并提供相關證據,一經查實,將立刻刪除涉嫌侵權內容。