您好,登錄后才能下訂單哦!
您好,登錄后才能下訂單哦!
這篇文章主要介紹了node如何實現github第三方登錄的相關知識,內容詳細易懂,操作簡單快捷,具有一定借鑒價值,相信大家閱讀完這篇node如何實現github第三方登錄文章都會有所收獲,下面我們一起來看看吧。

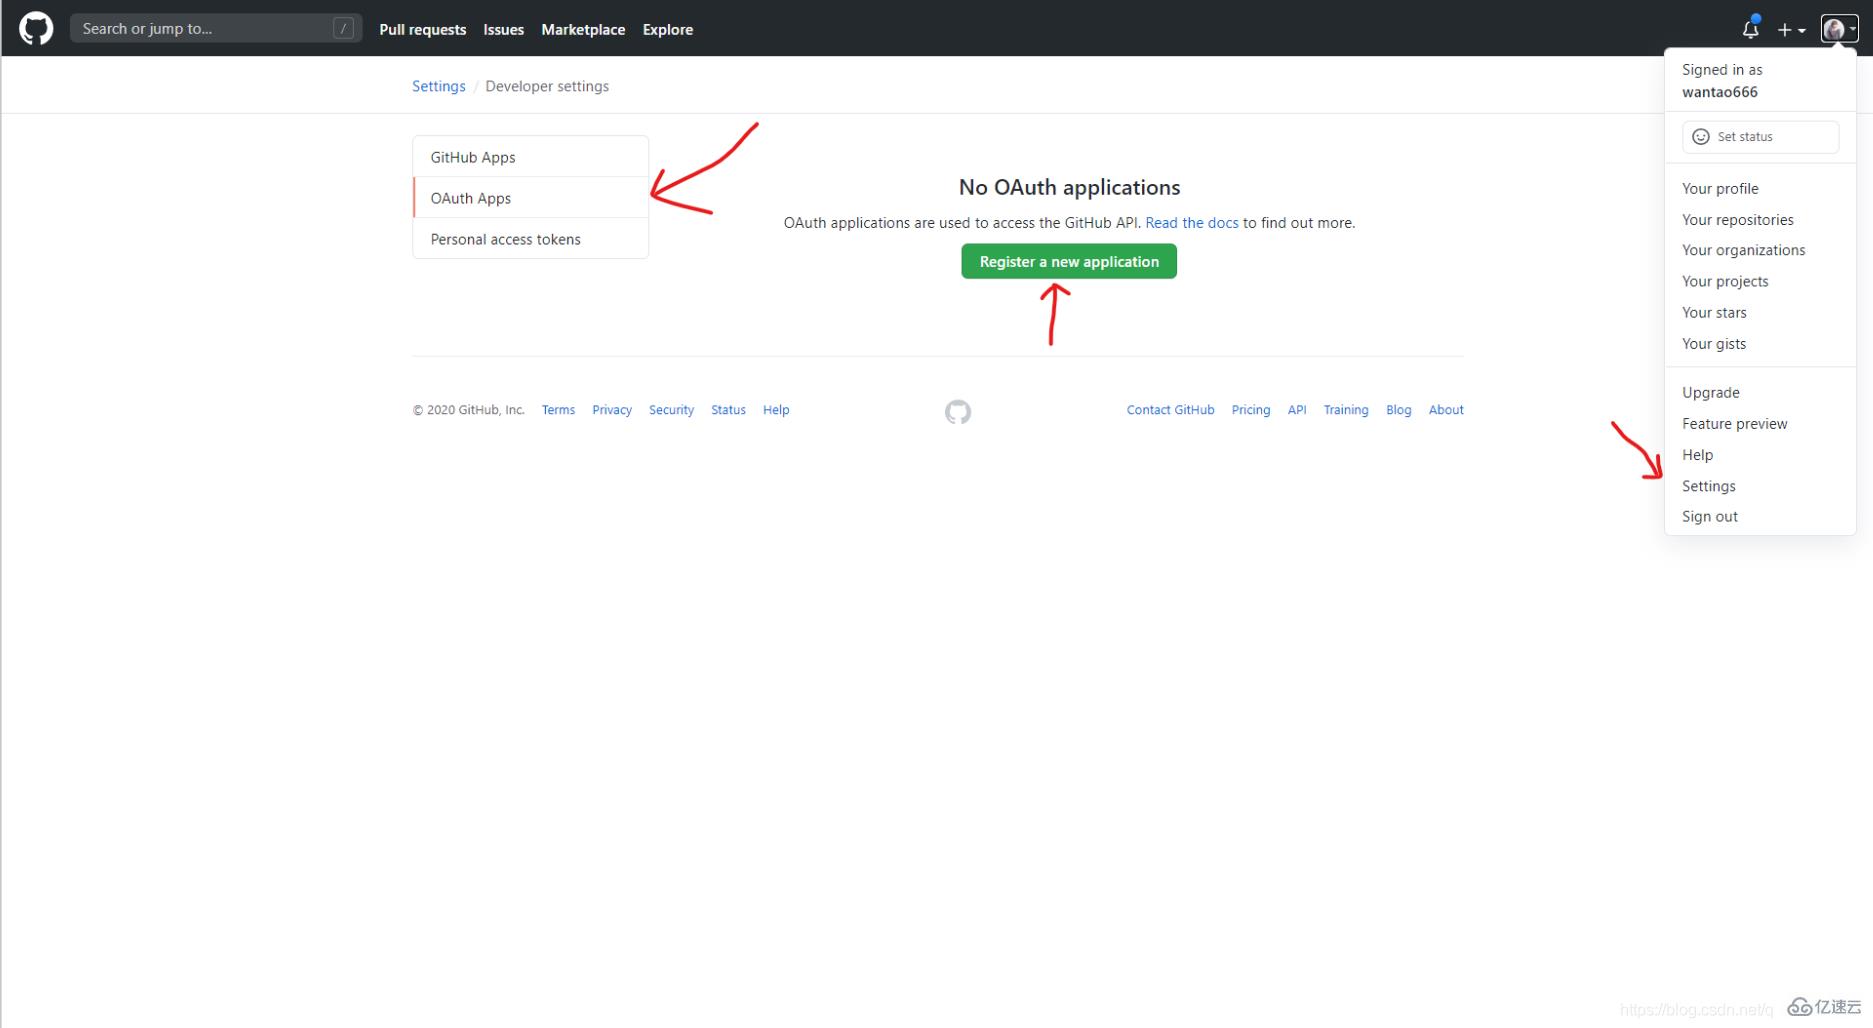
①登錄github,Settings=>Developer settings=>OAuth Apps=>Register a new application


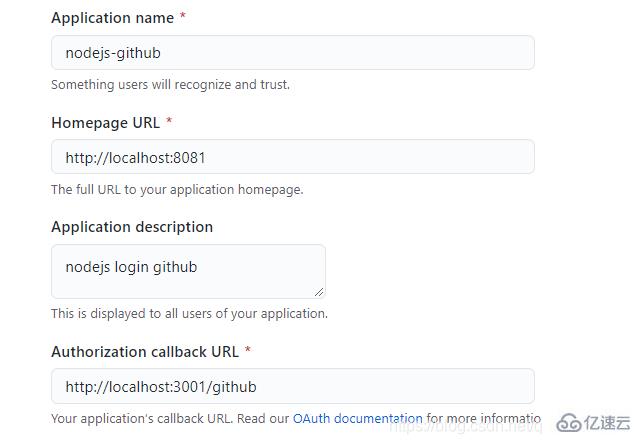
②填寫應用信息
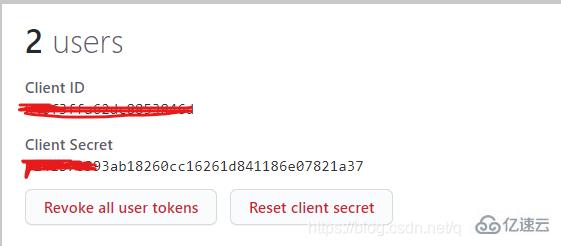
③注冊完成,得到Client ID和Client Secret

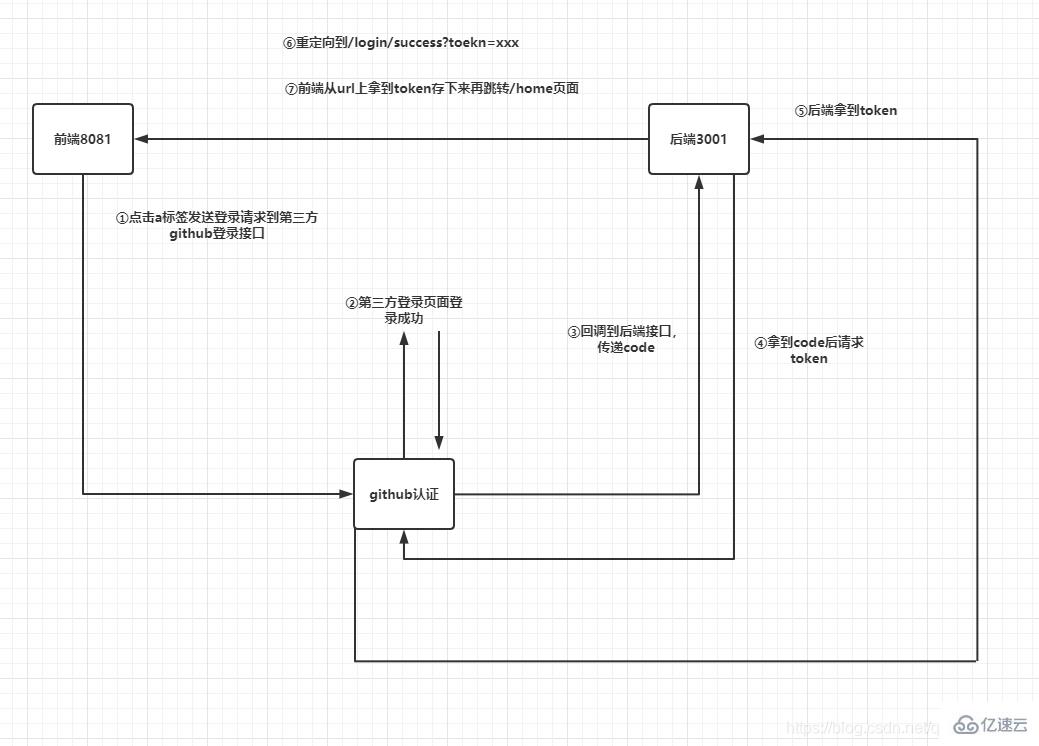
<a href="https://github.com/login/oauth/authorize?client_id={你自己的cilent_id}&redirect_uri=http://localhost:3001/github" class="iconfont ali-icon-github"></a>
router.get('/github',controller.auth.githubLogin)const axios = require('axios')
const querystring = require('querystring')
const config = {
client_id: "你自己的client_id",
client_secret: "你自己的client_secret"
}
class AuthController {
async githubLogin(ctx) {
const code = ctx.request.query.code
const params = {
client_id: config.client_id,
client_secret: config.client_secret,
code: code
}
let res = await axios.post('https://github.com/login/oauth/access_token', params)
console.log(res)
const token = querystring.parse(res.data).access_token
ctx.cookies.set('token', token, {
maxAge: ctx.config.jwt.expire * 1000,
});
res = { ...ctx.errCode.SUCCESS, data: { token } };
ctx.redirect('http://172.25.78.33:8081/login/success?token='+token)
}
}
module.exports = exports = new AuthController();
臨時頁面會跳轉的很快,基本上看不到。
<template>
  <h2>登錄成功跳轉首頁</h2>
</template>

<script>
import {setLoginedUser} from "@/http/axios";
export default {
  mounted() {
    setLoginedUser("github", this.$route.query.token);
    this.$message({
      message: "登錄成功",
      type: "success",
    });
    this.$router.push("/home");
  },
};
</script>

<style>
</style>
關于“node如何實現github第三方登錄”這篇文章的內容就介紹到這里,感謝各位的閱讀!相信大家對“node如何實現github第三方登錄”知識都有一定的了解,大家如果還想學習更多知識,歡迎關注億速云行業資訊頻道。
免責聲明:本站發布的內容(圖片、視頻和文字)以原創、轉載和分享為主,文章觀點不代表本網站立場,如果涉及侵權請聯系站長郵箱:is@yisu.com進行舉報,并提供相關證據,一經查實,將立刻刪除涉嫌侵權內容。