您好,登錄后才能下訂單哦!
您好,登錄后才能下訂單哦!
這篇文章主要介紹了怎么使用Docker部署openGauss國產數據庫的相關知識,內容詳細易懂,操作簡單快捷,具有一定借鑒價值,相信大家閱讀完這篇怎么使用Docker部署openGauss國產數據庫文章都會有所收獲,下面我們一起來看看吧。
openGauss是一款支持SQL2003標準語法,支持主備部署的高可用關系型數據庫。
多種存儲模式支持復合業務場景,新引入提供原地更新存儲引擎。
NUMA化數據結構支持高性能。
Paxos一致性日志復制協議,主備模式,CRC校驗支持高可用。
支持全密態計算、賬本數據庫等安全特性,提供全方位端到端的數據安全保護。
通過Table Access Method接口層支持多存儲引擎。
x86-64 CentOS 7.6
ARM64 openEuler 20.03 LTS
[root@node ~]# cat /etc/centos-release
CentOS Linux release 7.6.1810 (Core)
[root@node ~]# cat /etc/centos-release
CentOS Linux release 7.6.1810 (Core)
[root@node ~]# systemctl status docker
● docker.service - Docker Application Container Engine
   Loaded: loaded (/usr/lib/systemd/system/docker.service; enabled; vendor preset: disabled)
   Active: active (running) since Tue 2022-10-04 16:38:46 CST; 6min ago
     Docs: https://docs.docker.com
 Main PID: 10737 (dockerd)
    Tasks: 175
   Memory: 288.8M
   CGroup: /system.slice/docker.service
           ├─10737 /usr/bin/dockerd -H fd:// --containerd=/run/containerd/containerd.sock
           ├─21641 /usr/bin/docker-proxy -proto tcp -host-ip 0.0.0.0 -host-port 9000 -container-ip 172.17.0.2 -container-port 9000
           ├─21647 /usr/bin/docker-proxy -proto tcp -host-ip :: -host-port 9000 -container-ip 172.17.0.2 -container-port 9000
           ├─21712 /usr/bin/docker-proxy -proto tcp -host-ip 0.0.0.0 -host-port 6888 -container-ip 172.28.0.2 -container-port 6888
           ├─21718 /usr/bin/docker-proxy -proto tcp -host-ip :: -host-port 6888 -container-ip 172.28.0.2 -container-port 6888
           ├─21727 /usr/bin/docker-proxy -proto tcp -host-ip 0.0.0.0 -host-port 3396 -container-ip 172.27.0.2 -container-port 3306
           ├─21733 /usr/bin/docker-proxy -proto tcp -host-ip :: -host-port 3396 -container-ip 172.27.0.2 -container-port 3306
           ├─21747 /usr/bin/docker-proxy -proto tcp -host-ip 0.0.0.0 -host-port 8012 -container-ip 172.17.0.3 -container-port 80
           ├─21753 /usr/bin/docker-proxy -proto tcp -host-ip :: -host-port 8012 -container-ip 172.17.0.3 -container-port 80
           ├─21781 /usr/bin/docker-proxy -proto udp -host-ip 0.0.0.0 -host-port 6888 -container-ip 172.28.0.2 -container-port 6888
           ├─21787 /usr/bin/docker-proxy -proto udp -host-ip :: -host-port 6888 -container-ip 172.28.0.2 -container-port 6888
           ├─21794 /usr/bin/docker-proxy -proto tcp -host-ip 0.0.0.0 -host-port 8129 -container-ip 172.27.0.3 -container-port 80
           ├─21799 /usr/bin/docker-proxy -proto tcp -host-ip :: -host-port 8129 -container-ip 172.27.0.3 -container-port 80
           ├─21848 /usr/bin/docker-proxy -proto tcp -host-ip 0.0.0.0 -host-port 6800 -container-ip 172.28.0.2 -container-port 6800
           ├─21868 /usr/bin/docker-proxy -proto tcp -host-ip 0.0.0.0 -host-port 9080 -container-ip 172.17.0.4 -container-port 80
           ├─21874 /usr/bin/docker-proxy -proto tcp -host-ip :: -host-port 6800 -container-ip 172.28.0.2 -container-port 6800
           ├─21881 /usr/bin/docker-proxy -proto tcp -host-ip :: -host-port 9080 -container-ip 172.17.0.4 -container-port 80
           ├─21885 /usr/bin/docker-proxy -proto tcp -host-ip 0.0.0.0 -host-port 3306 -container-ip 192.168.224.3 -container-port 3306
           ├─21897 /usr/bin/docker-proxy -proto tcp -host-ip :: -host-port 3306 -container-ip 192.168.224.3 -container-port 3306
           ├─21910 /usr/bin/docker-proxy -proto tcp -host-ip 0.0.0.0 -host-port 3544 -container-ip 172.17.0.5 -container-port 3306
           ├─21920 /usr/bin/docker-proxy -proto tcp -host-ip :: -host-port 3544 -container-ip 172.17.0.5 -container-port 3306
           ├─21945 /usr/bin/docker-proxy -proto tcp -host-ip 0.0.0.0 -host-port 8712 -container-ip 172.17.0.6 -container-port 80
           ├─21951 /usr/bin/docker-proxy -proto tcp -host-ip :: -host-port 8712 -container-ip 172.17.0.6 -container-port 80
           ├─23999 /usr/bin/docker-proxy -proto tcp -host-ip 0.0.0.0 -host-port 8987 -container-ip 192.168.224.2 -container-port 8181
           └─24005 /usr/bin/docker-proxy -proto tcp -host-ip :: -host-port 8987 -container-ip 192.168.224.2 -container-port 8181

Oct 04 16:38:53 node dockerd[10737]: time="2022-10-04T16:38:53.566667153+08:00" level=info msg="ignoring event" container=b2b3518e620d51474c9679c...askDelete"
Oct 04 16:38:54 node dockerd[10737]: time="2022-10-04T16:38:54+08:00" level=info msg="Firewalld: docker zone already exists, returning"
Oct 04 16:38:54 node dockerd[10737]: time="2022-10-04T16:38:54.414988302+08:00" level=info msg="ignoring event" container=b2b3518e620d51474c9679c...askDelete"
Oct 04 16:38:55 node dockerd[10737]: time="2022-10-04T16:38:55+08:00" level=info msg="Firewalld: docker zone already exists, returning"
Oct 04 16:38:55 node dockerd[10737]: time="2022-10-04T16:38:55.726427597+08:00" level=info msg="ignoring event" container=b2b3518e620d51474c9679c...askDelete"
Oct 04 16:38:56 node dockerd[10737]: time="2022-10-04T16:38:56+08:00" level=info msg="Firewalld: docker zone already exists, returning"
Oct 04 16:38:57 node dockerd[10737]: time="2022-10-04T16:38:57.225224508+08:00" level=info msg="ignoring event" container=b2b3518e620d51474c9679c...askDelete"
Oct 04 16:38:58 node dockerd[10737]: time="2022-10-04T16:38:58+08:00" level=info msg="Firewalld: docker zone already exists, returning"
Oct 04 16:38:58 node dockerd[10737]: time="2022-10-04T16:38:58.973644718+08:00" level=info msg="ignoring event" container=b2b3518e620d51474c9679c...askDelete"
Oct 04 16:39:01 node dockerd[10737]: time="2022-10-04T16:39:01+08:00" level=info msg="Firewalld: docker zone already exists, returning"
Hint: Some lines were ellipsized, use -l to show in full.

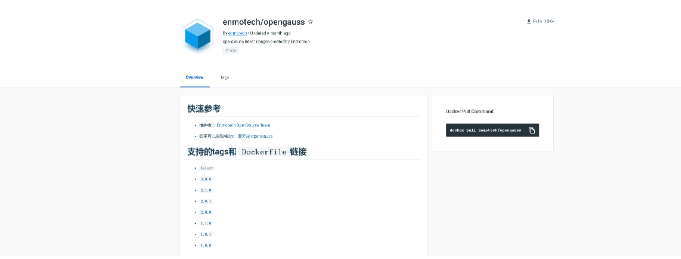
1.從3.0版本開始(包括3.0版本)
2.容器采用openGauss數據庫Lite版本
3.默認啟動后空載內存小于200M
4.添加vi,ps,等基礎命令
[root@node openguass]# docker pull enmotech/opengauss:3.0.0
3.0.0: Pulling from enmotech/opengauss
22c5ef60a68e: Pull complete
28692a7bf40a: Pull complete
53d8b65999fe: Pull complete
2feb7fb751a7: Pull complete
21970696c490: Pull complete
Digest: sha256:b8a21dfa15d57476528051f1b8b138dac45cfbad3ef97cba2b340433476147f8
Status: Downloaded newer image for enmotech/opengauss:3.0.0
docker.io/enmotech/opengauss:3.0.0
mkdir -p /data/openguass/
docker run --name opengauss -d --restart always --privileged=true  -e GS_PASSWORD=Admin@123456  \
    -v /data/opengauss/mysql:/var/lib/opengauss  -u root -p 15432:5432 \
    enmotech/opengauss:3.0.0
GS_PASSWORD:設置openGauss數據庫的超級用戶omm以及測試用戶gaussdb的密碼
GS_NODENAME:數據庫節點名稱,默認為gaussdb。
GS_USERNAME:數據庫連接用戶名,默認為gaussdb。
GS_PORT:數據庫端口,默認為5432。
[root@node openguass]# docker ps
CONTAINER ID   IMAGE                                 COMMAND                  CREATED          STATUS          PORTS                                                                                                                             NAMES
b5abda90d924   enmotech/opengauss:3.0.0              "entrypoint.sh gauss…"   25 seconds ago   Up 24 seconds   0.0.0.0:15432->5432/tcp, :::15432->5432/tcp
[root@node openguass]# docker exec -it 360296c286c9 /bin/bash
root@360296c286c9:/# su - omm
omm@360296c286c9:~$ gsql
gsql ((openGauss 3.0.0 build 02c14696) compiled at 2022-04-01 18:12:34 commit 0 last mr  )
Non-SSL connection (SSL connection is recommended when requiring high-security)
Type "help" for help.

omm=#
[admin@master ~]$ gsql -d postgres -U gaussdb  -W'Admin@123456' -h 192.168.3.167 -p15432
gsql ((openGauss 3.1.0 build 4e931f9a) compiled at 2022-09-29 14:19:24 commit 0 last mr  )
Non-SSL connection (SSL connection is recommended when requiring high-security)
Type "help" for help.

openGauss=>
wget https://raw.githubusercontent.com/enmotech/enmotech-docker-opengauss/master/create_master_slave.sh
OG_SUBNET (容器所在網段) [172.11.0.0/24]
GS_PASSWORD (定義數據庫密碼)[Enmo@123]
MASTER_IP (主庫IP)[172.11.0.101]
SLAVE_1_IP (備庫IP)[172.11.0.102]
MASTER_HOST_PORT (主庫數據庫服務端口)[5432]
MASTER_LOCAL_PORT (主庫通信端口)[5434]
SLAVE_1_HOST_PORT (備庫數據庫服務端口)[6432]
SLAVE_1_LOCAL_PORT (備庫通信端口)[6434]
MASTER_NODENAME (主節點名稱)[opengauss_master]
SLAVE_NODENAME (備節點名稱)[opengauss_slave1]
[root@node openguass]# cat create_master_slave.sh
#!/bin/bash -e
# Parameters
#!/bin/bash

#set OG_SUBNET,GS_PASSWORD,MASTER_IP,SLAVE_1_IP,MASTER_HOST_PORT,MASTER_LOCAL_PORT,SLAVE_1_HOST_PORT,SLAVE_1_LOCAL_PORT,MASTER_NODENAME,SLAVE_NODENAME

read -p "Please input OG_SUBNET (容器所在網段) [172.11.0.0/24]: " OG_SUBNET
OG_SUBNET=${OG_SUBNET:-172.11.0.0/24}
echo "OG_SUBNET set $OG_SUBNET"

read -p "Please input GS_PASSWORD (定義數據庫密碼)[Enmo@123]: " GS_PASSWORD
GS_PASSWORD=${GS_PASSWORD:-Enmo@123}
echo "GS_PASSWORD set $GS_PASSWORD"

read -p "Please input MASTER_IP (主庫IP)[172.11.0.101]: " MASTER_IP
MASTER_IP=${MASTER_IP:-172.11.0.101}
echo "MASTER_IP set $MASTER_IP"

read -p "Please input SLAVE_1_IP (備庫IP)[172.11.0.102]: " SLAVE_1_IP
SLAVE_1_IP=${SLAVE_1_IP:-172.11.0.102}
echo "SLAVE_1_IP set $SLAVE_1_IP"

read -p "Please input MASTER_HOST_PORT (主庫數據庫服務端口)[5432]: " MASTER_HOST_PORT
MASTER_HOST_PORT=${MASTER_HOST_PORT:-5432}
echo "MASTER_HOST_PORT set $MASTER_HOST_PORT"

read -p "Please input MASTER_LOCAL_PORT (主庫通信端口)[5434]: " MASTER_LOCAL_PORT
MASTER_LOCAL_PORT=${MASTER_LOCAL_PORT:-5434}
echo "MASTER_LOCAL_PORT set $MASTER_LOCAL_PORT"

read -p "Please input SLAVE_1_HOST_PORT (備庫數據庫服務端口)[6432]: " SLAVE_1_HOST_PORT
SLAVE_1_HOST_PORT=${SLAVE_1_HOST_PORT:-6432}
echo "SLAVE_1_HOST_PORT set $SLAVE_1_HOST_PORT"

read -p "Please input SLAVE_1_LOCAL_PORT (備庫通信端口)[6434]: " SLAVE_1_LOCAL_PORT
SLAVE_1_LOCAL_PORT=${SLAVE_1_LOCAL_PORT:-6434}
echo "SLAVE_1_LOCAL_PORT set $SLAVE_1_LOCAL_PORT"

read -p "Please input MASTER_NODENAME [opengauss_master]: " MASTER_NODENAME
MASTER_NODENAME=${MASTER_NODENAME:-opengauss_master}
echo "MASTER_NODENAME set $MASTER_NODENAME"

read -p "Please input SLAVE_NODENAME [opengauss_slave1]: " SLAVE_NODENAME
SLAVE_NODENAME=${SLAVE_NODENAME:-opengauss_slave1}
echo "SLAVE_NODENAME set $SLAVE_NODENAME"

read -p "Please input openGauss VERSION [3.0.0]: " VERSION
VERSION=${VERSION:-3.0.0}
echo "openGauss VERSION set $VERSION"

echo "starting  "

docker network create --subnet=$OG_SUBNET opengaussnetwork \
|| {
  echo ""
  echo "ERROR: OpenGauss Database Network was NOT successfully created."
  echo "HINT: opengaussnetwork Maybe Already Exsist Please Execute 'docker network rm opengaussnetwork' "
  exit 1
}
echo "OpenGauss Database Network Created."

docker run --network opengaussnetwork --ip $MASTER_IP --privileged=true \
--name $MASTER_NODENAME -h $MASTER_NODENAME -p $MASTER_HOST_PORT:$MASTER_HOST_PORT -d \
-e GS_PORT=$MASTER_HOST_PORT \
-e OG_SUBNET=$OG_SUBNET \
-e GS_PASSWORD=$GS_PASSWORD \
-e NODE_NAME=$MASTER_NODENAME \
-e REPL_CONN_INFO="replconninfo1 = 'localhost=$MASTER_IP localport=$MASTER_LOCAL_PORT localservice=$MASTER_HOST_PORT remotehost=$SLAVE_1_IP remoteport=$SLAVE_1_LOCAL_PORT remoteservice=$SLAVE_1_HOST_PORT'\n" \
enmotech/opengauss:$VERSION -M primary \
|| {
  echo ""
  echo "ERROR: OpenGauss Database Master Docker Container was NOT successfully created."
  exit 1
}
echo "OpenGauss Database Master Docker Container created."

sleep 30s

docker run --network opengaussnetwork --ip $SLAVE_1_IP --privileged=true \
--name $SLAVE_NODENAME -h $SLAVE_NODENAME -p $SLAVE_1_HOST_PORT:$SLAVE_1_HOST_PORT -d \
-e GS_PORT=$SLAVE_1_HOST_PORT \
-e OG_SUBNET=$OG_SUBNET \
-e GS_PASSWORD=$GS_PASSWORD \
-e NODE_NAME=$SLAVE_NODENAME \
-e REPL_CONN_INFO="replconninfo1 = 'localhost=$SLAVE_1_IP localport=$SLAVE_1_LOCAL_PORT localservice=$SLAVE_1_HOST_PORT remotehost=$MASTER_IP remoteport=$MASTER_LOCAL_PORT remoteservice=$MASTER_HOST_PORT'\n" \
enmotech/opengauss:$VERSION -M standby \
|| {
  echo ""
  echo "ERROR: OpenGauss Database Slave1 Docker Container was NOT successfully created."
  exit 1
}
echo "OpenGauss Database Slave1 Docker Container created."[root@node openguass]# sh create_master_slave.sh Please input OG_SUBNET (容器所在網段) [172.11.0.0/24]: OG_SUBNET set 172.11.0.0/24 Please input GS_PASSWORD (定義數據庫密碼)[Enmo@123]: GS_PASSWORD set Enmo@123 Please input MASTER_IP (主庫IP)[172.11.0.101]: MASTER_IP set 172.11.0.101 Please input SLAVE_1_IP (備庫IP)[172.11.0.102]: SLAVE_1_IP set 172.11.0.102 Please input MASTER_HOST_PORT (主庫數據庫服務端口)[5432]: MASTER_HOST_PORT set 5432 Please input MASTER_LOCAL_PORT (主庫通信端口)[5434]: MASTER_LOCAL_PORT set 5434 Please input SLAVE_1_HOST_PORT (備庫數據庫服務端口)[6432]: SLAVE_1_HOST_PORT set 6432 Please input SLAVE_1_LOCAL_PORT (備庫通信端口)[6434]: SLAVE_1_LOCAL_PORT set 6434 Please input MASTER_NODENAME [opengauss_master]: MASTER_NODENAME set opengauss_master Please input SLAVE_NODENAME [opengauss_slave1]: SLAVE_NODENAME set opengauss_slave1 Please input openGauss VERSION [3.0.0]: openGauss VERSION set 3.0.0 starting 97d6c3667b72511c0f09eea31b54b6c5d315af06252db1a7961b0861069f2b5a OpenGauss Database Network Created. 24c3c7ba6b162fabbe9ac4e21f4b188ebd49acbbba91e7458d287ad6731ce48f OpenGauss Database Master Docker Container created. 0376996ac00d91173e24ebea274d0750be9093269dcfdf479722c68952aa93a1 OpenGauss Database Slave1 Docker Container created.
[root@node openguass]# docker ps
CONTAINER ID   IMAGE                                 COMMAND                  CREATED              STATUS              PORTS                                                                                                                             NAMES
0376996ac00d   enmotech/opengauss:3.0.0              "entrypoint.sh -M st…"   About a minute ago   Up About a minute   5432/tcp, 0.0.0.0:6432->6432/tcp, :::6432->6432/tcp                                                                               opengauss_slave1
24c3c7ba6b16   enmotech/opengauss:3.0.0              "entrypoint.sh -M pr…"   2 minutes ago        Up 2 minutes        0.0.0.0:5432->5432/tcp, :::5432->5432/tcp                                                                                         opengauss_master
[root@node openguass]# docker exec -it 24c3c7ba6b16  /bin/bash
root@opengauss_master:/# su - omm
omm@opengauss_master:~$ gs_ctl query -D /var/lib/opengauss/data/
[2022-10-04 10:13:45.084][346][][gs_ctl]: gs_ctl query ,datadir is /var/lib/opengauss/data
 HA state:
	local_role                     : Primary
	static_connections             : 1
	db_state                       : Normal
	detail_information             : Normal

 Senders info:
	sender_pid                     : 319
	local_role                     : Primary
	peer_role                      : Standby
	peer_state                     : Normal
	state                          : Streaming
	sender_sent_location           : 0/40002E8
	sender_write_location          : 0/40002E8
	sender_flush_location          : 0/40002E8
	sender_replay_location         : 0/40002E8
	receiver_received_location     : 0/40002E8
	receiver_write_location        : 0/40002E8
	receiver_flush_location        : 0/40002E8
	receiver_replay_location       : 0/40002E8
	sync_percent                   : 100%
	sync_state                     : Sync
	sync_priority                  : 1
	sync_most_available            : On
	channel                        : 172.11.0.101:5434-->172.11.0.102:35454

 Receiver info:
No information

關于“怎么使用Docker部署openGauss國產數據庫”這篇文章的內容就介紹到這里,感謝各位的閱讀!相信大家對“怎么使用Docker部署openGauss國產數據庫”知識都有一定的了解,大家如果還想學習更多知識,歡迎關注億速云行業資訊頻道。
免責聲明:本站發布的內容(圖片、視頻和文字)以原創、轉載和分享為主,文章觀點不代表本網站立場,如果涉及侵權請聯系站長郵箱:is@yisu.com進行舉報,并提供相關證據,一經查實,將立刻刪除涉嫌侵權內容。