溫馨提示×
您好,登錄后才能下訂單哦!
點擊 登錄注冊 即表示同意《億速云用戶服務條款》
您好,登錄后才能下訂單哦!
本文小編為大家詳細介紹“OpenCV圖像處理之圖像拼接怎么實現”,內容詳細,步驟清晰,細節處理妥當,希望這篇“OpenCV圖像處理之圖像拼接怎么實現”文章能幫助大家解決疑惑,下面跟著小編的思路慢慢深入,一起來學習新知識吧。
將下面兩張圖像進行拼接
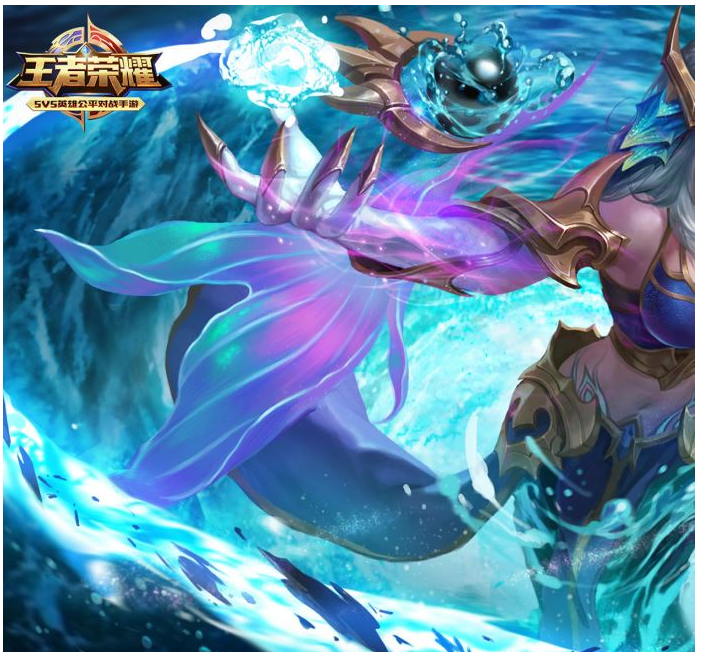
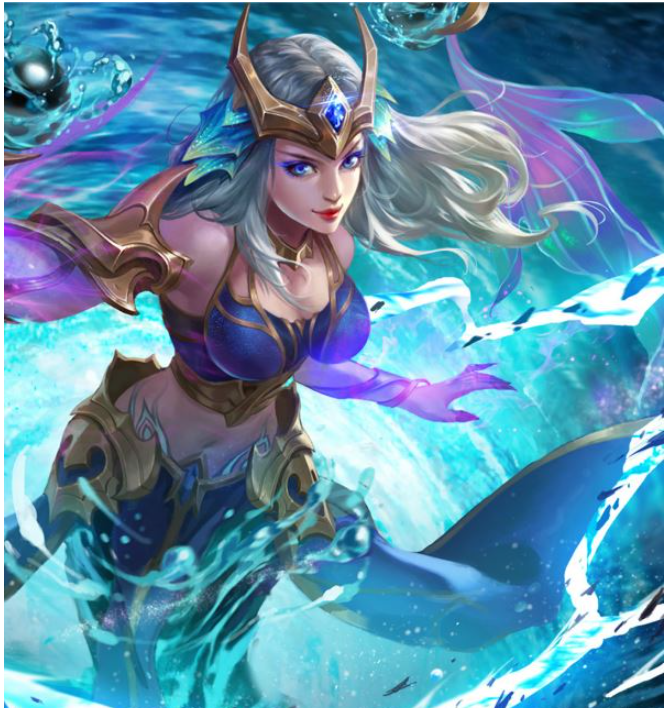
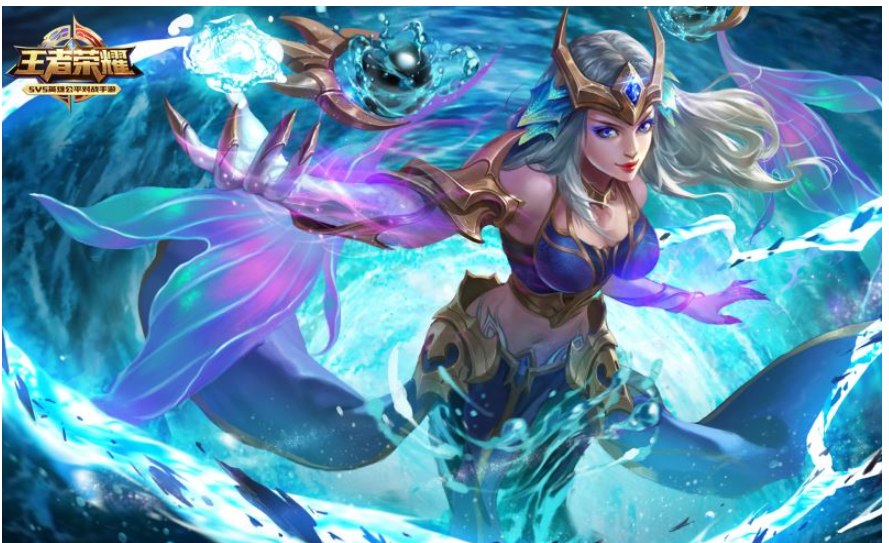
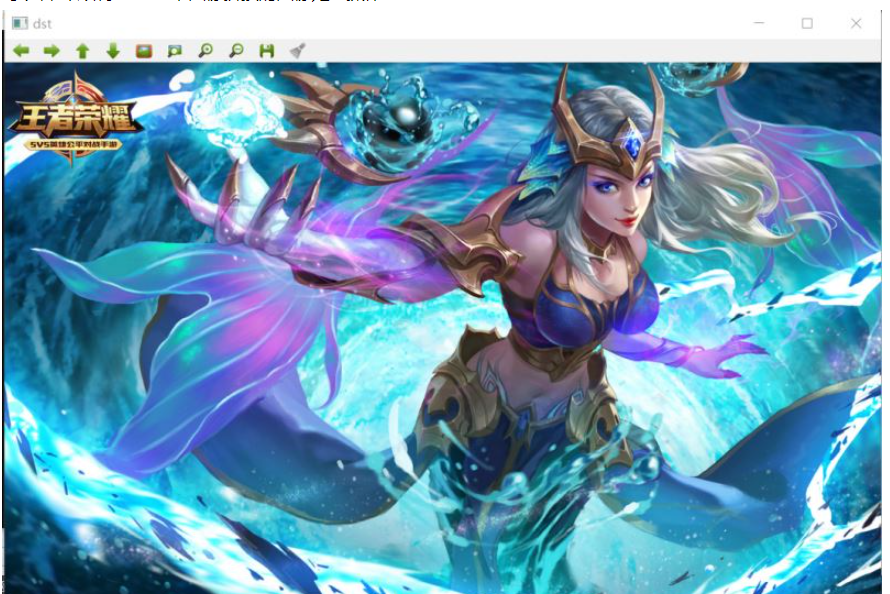
拼接得到一張完整的圖像
1.選擇特征點
    //1、選擇特征點
    //左圖 右圖 識別特征點 是Mat對象 用c d保存
    surf->detectAndCompute(left,Mat(),key2,d);
    surf->detectAndCompute(right,Mat(),key1,c);

    //特征點對比,保存   特征點為中心點區域比對
    vector<DMatch> matches;
    matcher.match(d,c,matches);

    //排序從小到大 找到特征點連線
    sort(matches.begin(),matches.end());
2.保存最優的特征點對象
    //2、保存最優的特征點對象
    vector<DMatch>good_matches;
    int ptrpoint = std::min(50,(int)(matches.size()*0.15));
    for (int i = 0;i < ptrpoint;i++)
    {
        good_matches.push_back(matches[i]);
    }

    //2-1、畫線 最優的特征點對象連線
    Mat outimg;
    drawMatches(left,key2,right,key1,good_matches,outimg,
                Scalar::all(-1),Scalar::all(-1),
                vector<char>(),DrawMatchesFlags::NOT_DRAW_SINGLE_POINTS);

    //imshow("outimg",outimg);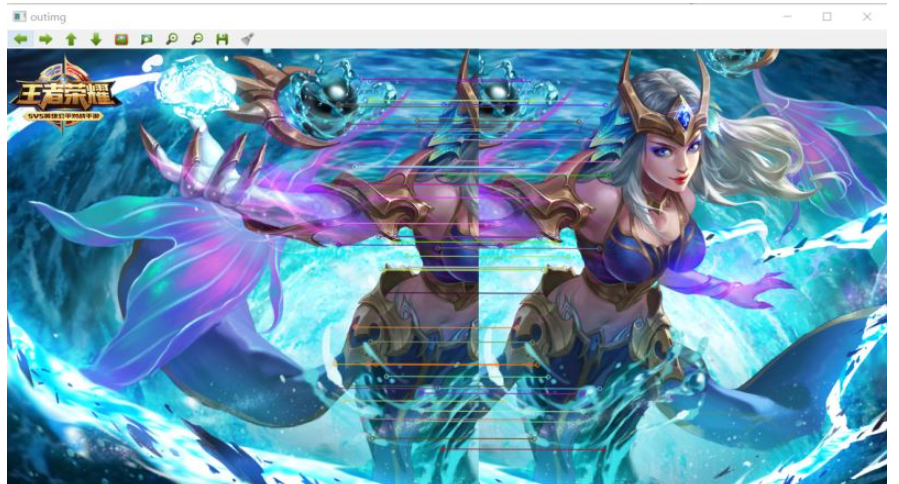
3.特征點匹配
    //3、特征點匹配
    vector<Point2f>imagepoint1,imagepoint2;
    for (int i= 0 ;i < good_matches.size();i++)
    {
        //查找特征點可連接處                          變形
        imagepoint1.push_back(key1[good_matches[i].trainIdx].pt);
        //查找特征點可連接處                          查找基準線
        imagepoint2.push_back(key2[good_matches[i].queryIdx].pt);
    }
4.透視轉換 圖像融合
    //4、透視轉換 圖形融合
    Mat homo = findHomography(imagepoint1,imagepoint2,CV_RANSAC);
    //imshow("homo",homo);

    //根據透視轉換矩陣進行計算 四個坐標
    CalcCorners(homo,right);

    //接收透視轉換結果
    Mat imageTransForm;
    //透視轉換
    warpPerspective(right,imageTransForm,homo,
                    Size(MAX(corners.right_top.x,corners.right_bottom.x),left.rows));

    //右圖透視變換 由于本次圖片材料是自己截圖拼接的 因此看不出透視變換的明顯特征
    //imshow("imageTransForm",imageTransForm);

    //結果進行整合
    int dst_width = imageTransForm.cols;
    int dst_height = left.rows;

    Mat dst(dst_height,dst_width,CV_8UC3);
    dst.setTo(0);

    imageTransForm.copyTo(dst(Rect(0,0,imageTransForm.cols,imageTransForm.rows)));
    left.copyTo(dst(Rect(0,0,left.cols,left.rows)));
右圖的透視轉換,由于圖像材料是自己截圖拼接的,因此看不出透視變換的明顯特征,但根據上圖可知已經做出透視變換圖像處理操作
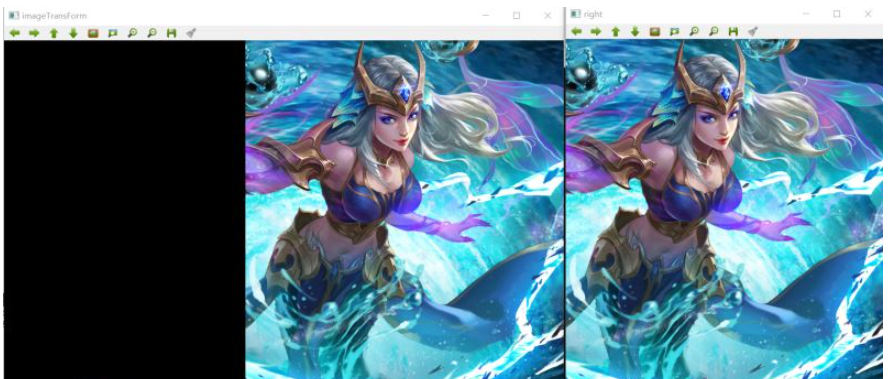
左圖與右圖的透視轉換結果 拼接 【這里只是將窗口移動測試看下前面步驟是否正確】
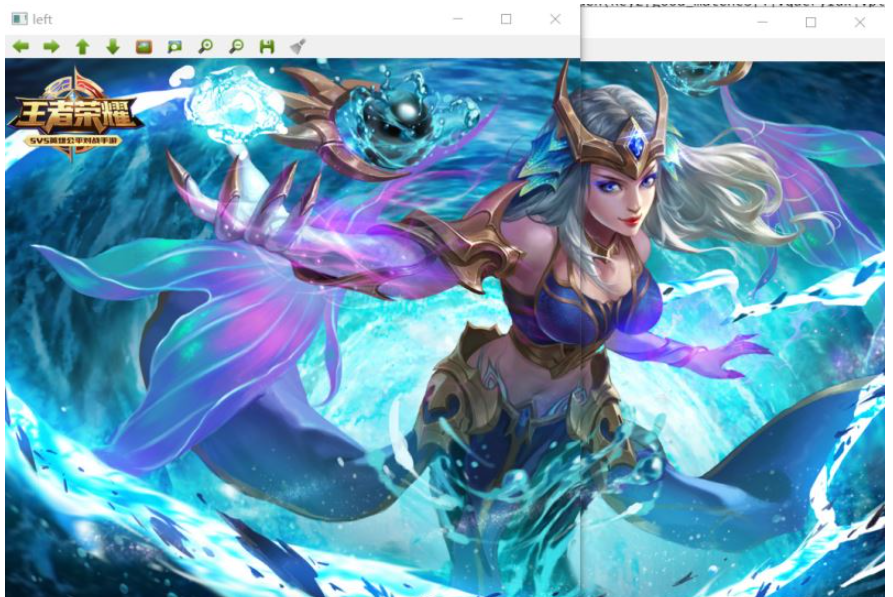
可以看出左圖與右圖的透視轉換結果 是可以進行接下來的圖像融合操作的
5.優化圖像 進行最終的結果展示
    //5、優化圖像
    OptimizeSeam(left,imageTransForm,dst);

    //最終圖像拼接結果
    imshow("dst",dst);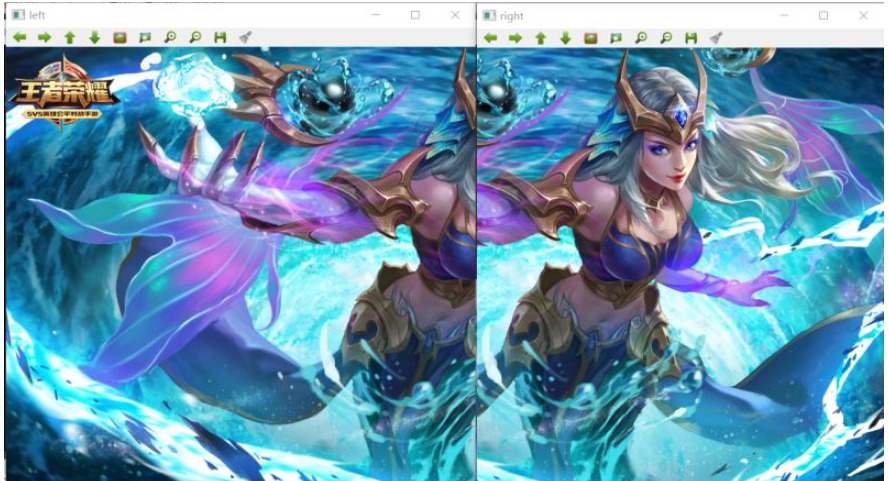
可以看出 順利完成 兩張圖像拼接的圖像處理操作
#include <iostream>
#include <opencv2/opencv.hpp>
#include <opencv2/highgui.hpp>//圖像融合
#include <opencv2/xfeatures2d.hpp>//拼接算法
#include <opencv2/calib3d.hpp>
#include <opencv2/imgproc.hpp>

using namespace std;
using namespace cv;
using namespace cv::xfeatures2d;

typedef struct
{
    Point2f left_top;
    Point2f left_bottom;
    Point2f right_top;
    Point2f right_bottom;
}four_corners_t;

four_corners_t corners;

void CalcCorners(const Mat& H, const Mat& src)
{
    double v2[] = { 0, 0, 1 };//左上角
    double v1[3];//變換后的坐標值
    Mat V2 = Mat(3, 1, CV_64FC1, v2);  //列向量
    Mat V1 = Mat(3, 1, CV_64FC1, v1);  //列向量

    V1 = H * V2;
    //左上角(0,0,1)
    cout << "V2: " << V2 << endl;
    cout << "V1: " << V1 << endl;
    corners.left_top.x = v1[0] / v1[2];
    corners.left_top.y = v1[1] / v1[2];

    //左下角(0,src.rows,1)
    v2[0] = 0;
    v2[1] = src.rows;
    v2[2] = 1;
    V2 = Mat(3, 1, CV_64FC1, v2);  //列向量
    V1 = Mat(3, 1, CV_64FC1, v1);  //列向量
    V1 = H * V2;
    corners.left_bottom.x = v1[0] / v1[2];
    corners.left_bottom.y = v1[1] / v1[2];

    //右上角(src.cols,0,1)
    v2[0] = src.cols;
    v2[1] = 0;
    v2[2] = 1;
    V2 = Mat(3, 1, CV_64FC1, v2);  //列向量
    V1 = Mat(3, 1, CV_64FC1, v1);  //列向量
    V1 = H * V2;
    corners.right_top.x = v1[0] / v1[2];
    corners.right_top.y = v1[1] / v1[2];

    //右下角(src.cols,src.rows,1)
    v2[0] = src.cols;
    v2[1] = src.rows;
    v2[2] = 1;
    V2 = Mat(3, 1, CV_64FC1, v2);  //列向量
    V1 = Mat(3, 1, CV_64FC1, v1);  //列向量
    V1 = H * V2;
    corners.right_bottom.x = v1[0] / v1[2];
    corners.right_bottom.y = v1[1] / v1[2];

}

//圖像融合的去裂縫處理操作
void OptimizeSeam(Mat& img1, Mat& trans, Mat& dst)
{
    int start = MIN(corners.left_top.x, corners.left_bottom.x);//開始位置,即重疊區域的左邊界

    double processWidth = img1.cols - start;//重疊區域的寬度
    int rows = dst.rows;
    int cols = img1.cols; //注意,是列數*通道數
    double alpha = 1;//img1中像素的權重
    for (int i = 0; i < rows; i++)
    {
        uchar* p = img1.ptr<uchar>(i);  //獲取第i行的首地址
        uchar* t = trans.ptr<uchar>(i);
        uchar* d = dst.ptr<uchar>(i);
        for (int j = start; j < cols; j++)
        {
            //如果遇到圖像trans中無像素的黑點,則完全拷貝img1中的數據
            if (t[j * 3] == 0 && t[j * 3 + 1] == 0 && t[j * 3 + 2] == 0)
            {
                alpha = 1;
            }
            else
            {
                //img1中像素的權重,與當前處理點距重疊區域左邊界的距離成正比,實驗證明,這種方法確實好
                alpha = (processWidth - (j - start)) / processWidth;
            }

            d[j * 3] = p[j * 3] * alpha + t[j * 3] * (1 - alpha);
            d[j * 3 + 1] = p[j * 3 + 1] * alpha + t[j * 3 + 1] * (1 - alpha);
            d[j * 3 + 2] = p[j * 3 + 2] * alpha + t[j * 3 + 2] * (1 - alpha);

        }
    }
}

int main()
{
    //左圖
    Mat left = imread("D:/00000000000003jieduanshipincailliao/a1.png");
    //右圖
    Mat right = imread("D:/00000000000003jieduanshipincailliao/a2.png");

    //左右圖顯示
    imshow("left",left);
    imshow("right",right);

    //創建SURF對象
    Ptr<SURF> surf;
    //create 函數參數 海森矩陣閥值 800特征點以內
    surf = SURF::create(800);

    //創建一個暴力匹配器 用于特征點匹配
    BFMatcher matcher;

    //特征點容器 存放特征點KeyPoint
    vector<KeyPoint>key1,key2;
    //保存特征點
    Mat c,d;

    //1、選擇特征點
    //左圖 右圖 識別特征點 是Mat對象 用c d保存
    surf->detectAndCompute(left,Mat(),key2,d);
    surf->detectAndCompute(right,Mat(),key1,c);

    //特征點對比,保存   特征點為中心點區域比對
    vector<DMatch> matches;
    matcher.match(d,c,matches);

    //排序從小到大 找到特征點連線
    sort(matches.begin(),matches.end());

    //2、保存最優的特征點對象
    vector<DMatch>good_matches;
    int ptrpoint = std::min(50,(int)(matches.size()*0.15));
    for (int i = 0;i < ptrpoint;i++)
    {
        good_matches.push_back(matches[i]);
    }

    //2-1、畫線 最優的特征點對象連線
    Mat outimg;
    drawMatches(left,key2,right,key1,good_matches,outimg,
                Scalar::all(-1),Scalar::all(-1),
                vector<char>(),DrawMatchesFlags::NOT_DRAW_SINGLE_POINTS);

    //imshow("outimg",outimg);

    //3、特征點匹配
    vector<Point2f>imagepoint1,imagepoint2;
    for (int i= 0 ;i < good_matches.size();i++)
    {
        //查找特征點可連接處                          變形
        imagepoint1.push_back(key1[good_matches[i].trainIdx].pt);
        //查找特征點可連接處                          查找基準線
        imagepoint2.push_back(key2[good_matches[i].queryIdx].pt);
    }

    //4、透視轉換 圖形融合
    Mat homo = findHomography(imagepoint1,imagepoint2,CV_RANSAC);
    //imshow("homo",homo);

    //根據透視轉換矩陣進行計算 四個坐標
    CalcCorners(homo,right);

    //接收透視轉換結果
    Mat imageTransForm;
    //透視轉換
    warpPerspective(right,imageTransForm,homo,
                    Size(MAX(corners.right_top.x,corners.right_bottom.x),left.rows));

    //右圖透視變換 由于本次圖片材料是自己截圖拼接的 因此看不出透視變換的明顯特征
    //imshow("imageTransForm",imageTransForm);

    //結果進行整合
    int dst_width = imageTransForm.cols;
    int dst_height = left.rows;

    Mat dst(dst_height,dst_width,CV_8UC3);
    dst.setTo(0);

    imageTransForm.copyTo(dst(Rect(0,0,imageTransForm.cols,imageTransForm.rows)));
    left.copyTo(dst(Rect(0,0,left.cols,left.rows)));

    //5、優化圖像
    OptimizeSeam(left,imageTransForm,dst);

    //最終圖像拼接結果
    imshow("dst",dst);

    waitKey(0);

    return 0;
}
讀到這里,這篇“OpenCV圖像處理之圖像拼接怎么實現”文章已經介紹完畢,想要掌握這篇文章的知識點還需要大家自己動手實踐使用過才能領會,如果想了解更多相關內容的文章,歡迎關注億速云行業資訊頻道。
免責聲明:本站發布的內容(圖片、視頻和文字)以原創、轉載和分享為主,文章觀點不代表本網站立場,如果涉及侵權請聯系站長郵箱:is@yisu.com進行舉報,并提供相關證據,一經查實,將立刻刪除涉嫌侵權內容。