您好,登錄后才能下訂單哦!
您好,登錄后才能下訂單哦!
本篇內容介紹了“如何使用java代碼代替xml實現SSM”的有關知識,在實際案例的操作過程中,不少人都會遇到這樣的困境,接下來就讓小編帶領大家學習一下如何處理這些情況吧!希望大家仔細閱讀,能夠學有所成!
SpringBoot推薦開發者使用Java配置來搭建框架,SpringBoot中大量的自動化配置都是通過Java代碼配置實現的,而不是XML配置,同理,我們自己也可以使用純Java來搭建一個SSM環境,即在項目中不存在任何XML配置,包括web.xml
環境要求:
Tomact版本必須在7以上

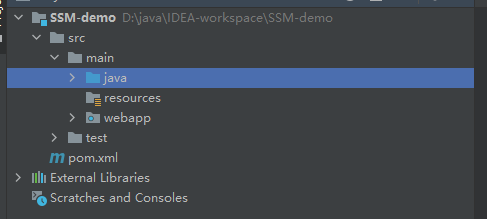
在pom.xml加入項目中需要用到的依賴
<?xml version="1.0" encoding="UTF-8"?>
<project xmlns="http://maven.apache.org/POM/4.0.0"
         xmlns:xsi="http://www.w3.org/2001/XMLSchema-instance"
         xsi:schemaLocation="http://maven.apache.org/POM/4.0.0 http://maven.apache.org/xsd/maven-4.0.0.xsd">
    <modelVersion>4.0.0</modelVersion>
    <groupId>com.xiao.ssm</groupId>
    <artifactId>SSM-demo</artifactId>
    <version>1.0-SNAPSHOT</version>
    <packaging>war</packaging>
    <properties>
        <maven.compiler.source>8</maven.compiler.source>
        <maven.compiler.target>8</maven.compiler.target>
        <tomcat.version>2.2</tomcat.version>
        <webserver.port>8888</webserver.port>
        <project.build.sourceEncoding>UTF-8</project.build.sourceEncoding>
    </properties>
    <dependencies>
        <!--引入springMVC依賴-->
        <dependency>
            <groupId>org.springframework</groupId>
            <artifactId>spring-webmvc</artifactId>
            <version>5.2.12.RELEASE</version>
        </dependency>
        <!--引入servlet依賴-->
        <!--scope作用域:
           1.compile,默認的scope(作用域),表示 dependency 都可以在生命周期中使用。而且,這些dependencies 會傳遞到依賴的項目中。適用于所有階段,會隨著項目一起發布
           2.provided,跟compile相似,但是表明了dependency 由JDK或者容器提供,例如Servlet AP和一些Java EE APIs。這個scope 只能作用在編譯和測試時,同時沒有傳遞性
           3.runtime,表示dependency不作用在編譯時,但會作用在運行和測試時,如JDBC驅動,適用運行和測試階段
           4.test,表示dependency作用在測試時,不作用在運行時。 只在測試時使用,用于編譯和運行測試代碼。不會隨項目發布
           5.system,跟provided 相似,但是在系統中要以外部JAR包的形式提供,maven不會在repository查找它
        -->
        <dependency>
            <groupId>javax.servlet</groupId>
            <artifactId>javax.servlet-api</artifactId>
            <version>4.0.1</version>
            <scope>provided</scope>
        </dependency>
        <dependency>
            <groupId>javax.servlet.jsp</groupId>
            <artifactId>jsp-api</artifactId>
            <version>2.2</version>
        </dependency>
    </dependencies>
    <build>
        <plugins>
            <!-- tomcat7插件 -->
            <plugin>
                <groupId>org.apache.tomcat.maven</groupId>
                <artifactId>tomcat7-maven-plugin</artifactId>
                <version>${tomcat.version}</version>
                <configuration>
                    <port>${webserver.port}</port>
                    <path>/${project.artifactId}</path>
                    <uriEncoding>${project.build.sourceEncoding}</uriEncoding>
                </configuration>
            </plugin>
        </plugins>
    </build>
    <repositories>
        <repository>
            <id>central</id>
            <url>https://maven.aliyun.com/nexus/content/repositories/central</url>
        </repository>
    </repositories>
    <pluginRepositories>
        <pluginRepository>
            <id>central</id>
            <url>https://maven.aliyun.com/nexus/content/repositories/central</url>
        </pluginRepository>
    </pluginRepositories>
</project>創建SpringConfig.java文件
package com.xiao.config;
import org.springframework.context.annotation.ComponentScan;
import org.springframework.context.annotation.Configuration;
import org.springframework.context.annotation.FilterType;
import org.springframework.stereotype.Controller;
/**
 * @author xiaoss
 * @Configuration注解標識該類是一個配置類,作用類似于:applicationContext.xml文件
 * @ComponentScan注解標識配置包掃描,useDefaultFilters表示使用默認的過濾器,excludeFilters里面的配置表示除去Controller里面的注解,
 * 即項目啟動時候,spring容器只掃描除了Controller類之外的所有bean
 * @date 2021年10月29日 16:43
 */
@Configuration
@ComponentScan(basePackages = "com.xiao",useDefaultFilters = true,
        excludeFilters = {@ComponentScan.Filter(type = FilterType.ANNOTATION,classes = Controller.class)})
public class SpringConfig {
}創建SpringMVCConfig.java文件
package com.xiao.config;
import org.springframework.context.annotation.ComponentScan;
import org.springframework.context.annotation.Configuration;
import org.springframework.context.annotation.FilterType;
import org.springframework.stereotype.Controller;
import org.springframework.web.servlet.config.annotation.ResourceHandlerRegistry;
import org.springframework.web.servlet.config.annotation.ViewResolverRegistry;
import org.springframework.web.servlet.config.annotation.WebMvcConfigurationSupport;
/**
 * @author xiaoss
 * @date 2021年10月29日 16:56
 */
@Configuration
//@ComponentScan(basePackages = "com.xiao",useDefaultFilters = true,
//        excludeFilters = {@ComponentScan.Filter(type = FilterType.ANNOTATION,classes = Controller.class)})
@ComponentScan(basePackages = "com.xiao")
public class SpringMVCConfig extends WebMvcConfigurationSupport {
    /**
     * 配置靜態資源過濾,相當于   <mvc:resources mapping="/**" location="/"></>
     * @param registry
     */
    @Override
    protected void addResourceHandlers(ResourceHandlerRegistry registry) {
        registry.addResourceHandler("/js/**").addResourceLocations("classpath:/");
    }
    /**
     * 配置視圖解析器
     * @param registry
     */
    @Override
    protected void configureViewResolvers(ViewResolverRegistry registry) {
        registry.jsp("/jsp/",".jsp");
    }

    /**
     * 路徑映射
     * @param registry
     */
    @Override
    protected void addViewControllers(ViewControllerRegistry registry) {
        registry.addViewController("/hello3").setViewName("hello");
    }

    /**
     * json轉換配置
     * @param converters
     */
    @Override
    protected void configureMessageConverters(List<HttpMessageConverter<?>> converters) {
        FastJsonHttpMessageConverter converter=new FastJsonHttpMessageConverter();
        converter.setDefaultCharset(Charset.forName("UTF-8"));
        FastJsonConfig fastJsonConfig=new FastJsonConfig();
        fastJsonConfig.setCharset(Charset.forName("UTF-8"));
        converter.setFastJsonConfig(fastJsonConfig);
        converters.add(converter);
    }
}
4.配置web.xml
創建WebInit.java文件
package com.xiao.config;
import org.springframework.web.WebApplicationInitializer;
import org.springframework.web.context.support.AnnotationConfigWebApplicationContext;
import org.springframework.web.servlet.DispatcherServlet;
import javax.servlet.ServletContext;
import javax.servlet.ServletException;
import javax.servlet.ServletRegistration;
/**
 * @author xiaoss
 * @date 2021年10月29日 17:13
 */
public class WebInit implements WebApplicationInitializer {
    @Override
    public void onStartup(ServletContext servletContext) throws ServletException {
        //首先來加載SpringMVC的配置文件
        AnnotationConfigWebApplicationContext ctx=new AnnotationConfigWebApplicationContext();
        ctx.register(SpringMVCConfig.class);
        //添加DispatcherServlet
        ServletRegistration.Dynamic springmvc=servletContext.addServlet("springmvc",new DispatcherServlet(ctx));
        //給DispatcherServlet添加路徑映射
        springmvc.addMapping("/");
        //給DispatcherServlet添加啟動時機
        springmvc.setLoadOnStartup(1);
    }
}
WebInit的作用類似于web.xml,這個類需要實現WebApplicationInitializer接口,并實現其方法,當項目啟動時,onStartup方法會被自動執行,我們可以在這里進行項目初始化操作,如:加載SpringMVC容器,添加過濾器,添加Listener,添加Servlet等
注:
由于在onStartup里面只加載了springmvc配置,沒有加載spring容器,如果要加載Spring容器
方案一:
修改springmvc配置,在配置的包掃描中也去掃描@Configuration注解
推薦 方案二:
去掉springConfig文件,講所有的配置都放到springmvc里面
package com.xiao.control;
import org.springframework.web.bind.annotation.GetMapping;
import org.springframework.web.bind.annotation.RestController;
/**
 * @author xiaoss
 * @date 2021年10月29日 17:00
 */
@RestController
public class HelloController {
    @GetMapping("/hello")
    public String hello(){
        return "hello";
    }
}
運行結果:

package com.xiao.control;
import org.springframework.stereotype.Controller;
import org.springframework.web.bind.annotation.GetMapping;
/**
 * @author xiaoss
 * @date 2021年10月29日 22:17
 */
@Controller
public class HelloController2 {
    @GetMapping("hello2")
    public String hello2(){
        return "hello";
    }
}
運行結果:


SpringMVC可以接收json參數,也可以返回json參數,這一切依賴于HttpMessageConverter
HttpMessageConverter可以將一個json字符串轉為對象,也可以將一個對象轉為json字符串,實際上它的底層還是依賴具體的json庫
SpringMVC中默認提供了Jackson和gson的HttpMessageConverter,分別是:
MappingJackson2HttpMessageConverter
GsonHttpMessageConverter
“如何使用java代碼代替xml實現SSM”的內容就介紹到這里了,感謝大家的閱讀。如果想了解更多行業相關的知識可以關注億速云網站,小編將為大家輸出更多高質量的實用文章!
免責聲明:本站發布的內容(圖片、視頻和文字)以原創、轉載和分享為主,文章觀點不代表本網站立場,如果涉及侵權請聯系站長郵箱:is@yisu.com進行舉報,并提供相關證據,一經查實,將立刻刪除涉嫌侵權內容。