您好,登錄后才能下訂單哦!
您好,登錄后才能下訂單哦!
本篇內容主要講解“在vue2中怎么利用svg開發一個環形進度條組件”,感興趣的朋友不妨來看看。本文介紹的方法操作簡單快捷,實用性強。下面就讓小編來帶大家學習“在vue2中怎么利用svg開發一個環形進度條組件”吧!

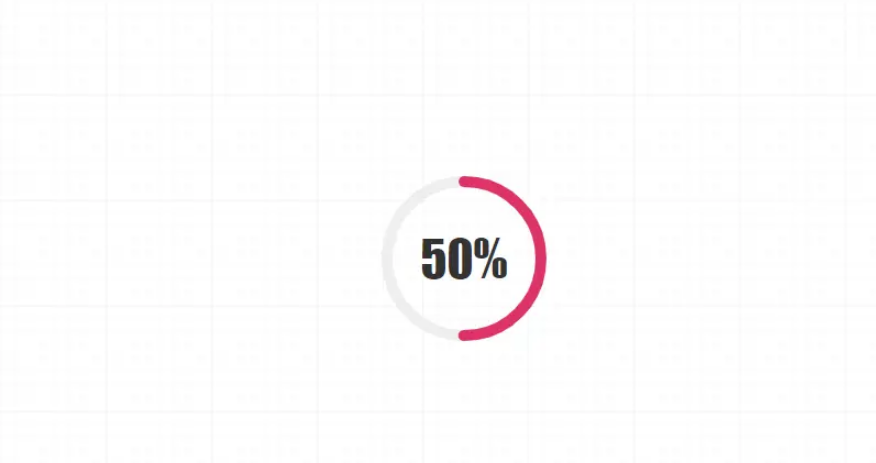
普通的矩形進度條我們通過div+css很容易就可以實現,而環形的就有點麻煩,當然他也可以用div+css通過背景屬性或者clip屬性配合css3變量做障眼法去實現,但是過于復雜而且兼容和控制起來都比較麻煩,所以,達到最佳效果我們還是去使用svg實現吧。
開發自己組件好處就是,里面的大小,顏色,粗細,動畫等等都可以任意擴展,準備好了么,馬上要開始啦~
<script>
export default {
  name: "CircleProgress",
  data() {
    return {
      now: 0
    };
  },
  props: {
    // 進度值
    value: {
      type: [String, Number],
      default: 0
    },
    // 尺寸
    size: {
      type: [String, Number],
      default: 120
    },
    // 邊框粗細
    strokeWidth:{
      type: [String, Number],
      default: 10
    },
    // 進度條顏色
    color: {
      type: String,
      default: "rgba(153,202,251,1)"
    },
    // 動畫執行時間
    duration:{
      type: [String, Number],
      default: 1000
    }
  },
  computed: {
    percentage() {
      return this.value;
    },
    countDown() {
      return this.now;
    },
    // 圓心x軸坐標
    cx() {
      return this.size / 2;
    },
    // 圓心y軸坐標
    cy() {
      return this.size / 2;
    },
    // 半徑
    radius() {
      return (this.size - this.strokeWidth) / 2;
    },
    // 圓周長
    circumference() {
      return 2 * Math.PI * this.radius;
    },
    // 進度長度
    progress() {
      return (1 - this.now / 100) * this.circumference;
    }
  },
};
</script>
相信大家通過上面的注釋怎么開發就會猜的八九不十,我們的這個組件可以設置大小,邊框粗細,進度條顏色,和后面要多久從0呈現出進度值的動畫時長。至于計算屬性,會在后面繪制svg的時候,根據注釋一一對應不難看出來目的。
<template>
  <div class="circle-main">
    <div class="circle-main-box" :style="[{ 'width': size+'px','height': size+'px'}]">
      <svg :width="size" :height="size" class="circle">
        <circle
          :r="radius"
          :cx="cx"
          :cy="cy"
          fill="transparent"
          stroke="#EEEEEE"
          :stroke-width="strokeWidth"
        />
        <circle
          :r="radius"
          :cx="cx"
          :cy="cy"
          fill="transparent"
          :stroke="color"
          :stroke-width="strokeWidth"
          stroke-linecap="round"
          :stroke-dasharray="circumference"
          :stroke-dashoffset="progress"
        />
      </svg>
      <span class="count-num" :style="[{ 'font-size': size*.3+'px'}]">{{countDown}}%</span>
    </div>
  </div>
</template>
其實這個很簡單就是用svg寫兩個圓環,第一作為灰色底圓,第二個就是我們的進度條了,設置好大小圓心半徑邊框色,而且我們要把填充色變為同名,都寫完了剩下兩項stroke-dasharray和stroke-dashoffset,相信大家都會猜的到了,svg進度條變化核心就是這兩個屬性,剛剛計算屬性也算出來了,分別就是圓環的周長和當前進度的長度。我們利用當前進度值來計算百分比占當前的長度,實現環形進度條的變化,就是這么簡單。
然后我們還要寫一丟丟css,而且是必須寫,因為svg圓環不是從我們認為的0度開始,而是偏移了90度。

所以我們要用css再給他轉過90度來!
.circle {
  transform: rotate(-90deg);
}
然后我們順便寫好文字和主框的一些樣式。
.circle-main-box {
  position: relative;
  display: block;
  margin: 0 auto;
}
.count-num {
  width: 100px;
  height: 100px;
  position: absolute;
  left: 50%;
  top: 50%;
  margin-left: -50px;
  margin-top: -50px;
  align-items: center;
  justify-content: center;
  display: flex;
  font-family: fantasy;
  font-size: 30px;
  color: #333;
  user-select: none;
}
這樣我們就得到了一個靜態的環形進度條了。
<script>
export default {
  name: "CircleProgress",
  // ...
  mounted() {
    this.run();
  },
  methods: {
    run() {
      if (this.value == 0) return;
      let t = this.duration / this.value
      this.timer = setInterval(() => {
        if (this.now >= this.value) {
          return clearInterval(this.timer);
        }
        this.now++;
      }, t);
    }
  }
};
我們會通過當前動畫執行時間與當前的值計算出每次數量+1執行的時間,然后通過 setInterval去執行,直至達到進度值。最后,我們就要開始使用這個組件啦~~
<div id="app">
    <CircleProgress :value="60" :size="150" :color="'#d36'"  :duration="3000" />
</div>
到此,相信大家對“在vue2中怎么利用svg開發一個環形進度條組件”有了更深的了解,不妨來實際操作一番吧!這里是億速云網站,更多相關內容可以進入相關頻道進行查詢,關注我們,繼續學習!
免責聲明:本站發布的內容(圖片、視頻和文字)以原創、轉載和分享為主,文章觀點不代表本網站立場,如果涉及侵權請聯系站長郵箱:is@yisu.com進行舉報,并提供相關證據,一經查實,將立刻刪除涉嫌侵權內容。