您好,登錄后才能下訂單哦!
您好,登錄后才能下訂單哦!
下文給大家帶來HAproxy+Keepalived負載均衡-高可用web站詳細流程介紹,希望能夠給大家在實際運用中帶來一定的幫助,負載均衡涉及的東西比較多,理論也不多,網上有很多書籍,今天我們就用億速云在行業內累計的經驗來做一個解答。
haproxy+keepalived負載均衡高可用web站
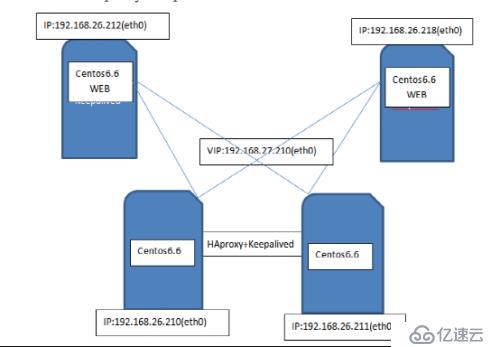
OS | IP | 子網掩碼 | 路由網關 |
Centos6.6 HAproxy Keepalived | Eth0:192.168.26.210 | 255.255.252.0 | 192.168.25.3 |
VIP:192.168.27.210 | |||
Centos6.6 HAporxy Keepalived | Eth0:192.168.26.211 | 255.255.252.0 | 192.168.25.3 |
VIP:192.168.27.210 | |||
Centos6.6(WEB) | Eth0:192.168.26.212 | 255.255.252.0 | 192.168.25.3 |
Centos6.6(WEB) | Eth0:192.168.26.218 | 255.255.252.0 | 192.168.25.3 |
1、安裝Apache服務192.168.26.212和192.168.26.218:(yum install httpd –y)略啟動
啟動Apache,分別在兩臺云服務器上創建WEB頁并確保網絡能正常訪問:


2、安裝HAproxy:192.168.26.210和192.168.26.211:
Yum install –y haproxy
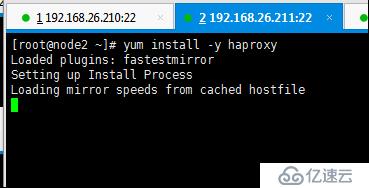
編輯配置文件:vim /etc/haproxy/haproxy.cfg
#---------------------------------------------------------------------
# Example configuration for a possible web application. See the
# full configuration options online.
#
# http://haproxy.1wt.eu/download/1.4/doc/configuration.txt
#
#---------------------------------------------------------------------
#---------------------------------------------------------------------
# Global settings
#---------------------------------------------------------------------
global
# to have these messages end up in /var/log/haproxy.log you will
# need to:
#
# 1) configure syslog to accept network log events. This is done
# by adding the '-r' option to the SYSLOGD_OPTIONS in
# /etc/sysconfig/syslog
#
# 2) configure local2 events to go to the /var/log/haproxy.log
# file. A line like the following can be added to
# /etc/sysconfig/syslog
#
# local2.* /var/log/haproxy.log
#
log 127.0.0.1 local2
chroot /var/lib/haproxy
pidfile /var/run/haproxy.pid
maxconn 4000
user haproxy
group haproxy
daemon
# turn on stats unix socket
stats socket /var/lib/haproxy/stats
#---------------------------------------------------------------------
# common defaults that all the 'listen' and 'backend' sections will
# use if not designated in their block
#---------------------------------------------------------------------
defaults
mode http
log global
option httplog
option dontlognull
option http-server-close
option forwardfor except 127.0.0.0/8
option redispatch
retries 3
timeout http-request 10s
timeout queue 1m
timeout connect 10s
timeout client 1m
timeout server 1m
timeout http-keep-alive 10s
timeout check 10s
maxconn 3000
#---------------------------------------------------------------------
# main frontend which proxys to the backends
#---------------------------------------------------------------------
#frontend main *:5000
# acl url_static path_beg -i /static /p_w_picpaths /javascript /stylesheets
# acl url_static path_end -i .jpg .gif .png .css .js
#
# use_backend static if url_static
# default_backend app
#
##---------------------------------------------------------------------
## static backend for serving up p_w_picpaths, stylesheets and such
##---------------------------------------------------------------------
#backend static
# balance roundrobin
# server static 127.0.0.1:4331 check
frontend websrv *:80
default_backend webservers
backend webservers
balance roundrobin
server node3 192.168.26.212:80 check
server node4 192.168.26.218:80 check
listen statick
bind *:1024
stats enable
stats uri /haadmin?stats
stats auth admin:admin
stats hide-version
stats admin if TRUE
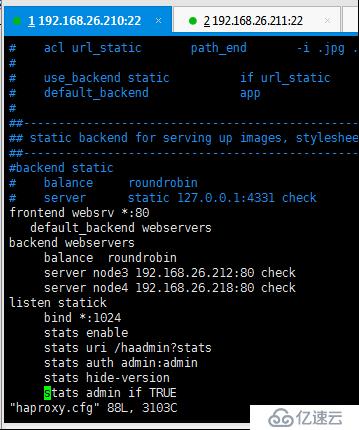
192.168.26.211上配置文件也一樣:因此我們直接SCP過去。
scp -p haproxy.cfg node2:/etc/haproxy/

啟動兩臺服務器上的HAproxy服務。


安裝keepalived:192.168.26.210和192.168.26.211
首先192.168.26.210配置:
Yum install –y keepalived

編輯配置文件:vim /etc/keepalived/keepalived.conf

配置文件:
! Configuration File for keepalived
global_defs {
notification_email {
acassen@firewall.loc
failover@firewall.loc
sysadmin@firewall.loc
}
notification_email_from jwenshan@163.com
smtp_server 192.168.200.1
smtp_connect_timeout 30
router_id LVS_DEVEL
}
vrrp_script chk_haproxy {
script "/etc/keepalived/chk.sh" //檢查haproxy的腳本
interval 2 //每兩秒檢查一次
}
vrrp_instance VI_1 {
state BACKUP //定義為BACKUP節點
nopreempt //開啟不搶占
interface eth0
virtual_router_id 51
priority 100 //開啟了不搶占,所以此處優先級必須高于另一臺
advert_int 1
authentication {
auth_type PASS
auth_pass jerry
}
virtual_ipaddress {
192.168.27.210 //配置VIP
}
track_script {
chk_haproxy //調用檢查腳本
}
notify_backup "/etc/init.d/haproxy restart"
notify_fault "/etc/init.d/haproxy stop"
}
創建腳本文件:主要用于檢測haproxy狀態。
Vim /etc/keepalived/Chk.sh
#!/bin/bash
#
if [ $(ps -C haproxy --no-header | wc -l) -eq 0 ]; then
/etc/init.d/keepalived stop
Fi

啟動Keepalived服務:
service keepalived start
192.168.26.211配置:
Yum install –y keepalived

編輯配置文件:Vim /etc/keepalived/keepalived.conf
! Configuration File for keepalived
global_defs {
notification_email {
acassen@firewall.loc
failover@firewall.loc
sysadmin@firewall.loc
}
notification_email_from jwenshan@163.com
smtp_server 192.168.200.1
smtp_connect_timeout 30
router_id LVS_DEVEL
}
vrrp_script chk_haproxy {
script "/etc/keepalived/chk.sh"
interval 2
}
vrrp_instance VI_1 {
state BACKUP
nopreempt
interface eth0
virtual_router_id 51
priority 99
advert_int 1
authentication {
auth_type PASS
auth_pass jerry
}
virtual_ipaddress {
192.168.27.210
}
track_script {
chk_haproxy
}
notify_backup "/etc/init.d/haproxy restart"
notify_fault "/etc/init.d/haproxy stop"
}
腳本文件:vim /etc/keepalived/chk.sh
#!/bin/bash
#
if [ $(ps -C haproxy --no-header | wc -l) -eq 0 ]; then
/etc/init.d/keepalived stop
Fi
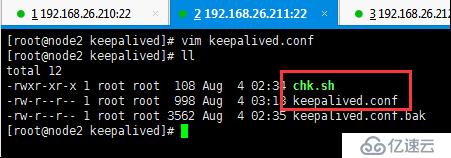
啟動Keepalived服務
Service keepalived start
測試VIP網絡是否通暢:ping 192.168.27.210 –t

訪問VIP網絡:
Http://192.168.27.210
不斷刷新瀏覽器觀察顯示結果


測試通過VIP訪問后臺監控頁面:

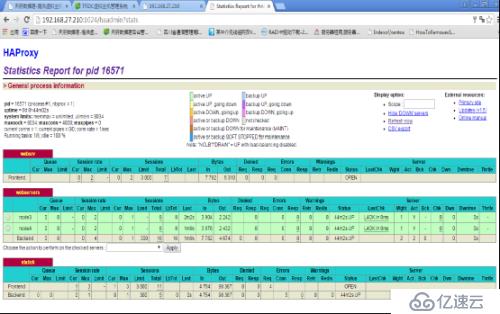
訪問成功。
測試高可用:

停掉192.168.26.210上Keepalived 觀察結果:
Service keepalived stop
首先VIP網絡出現波動:
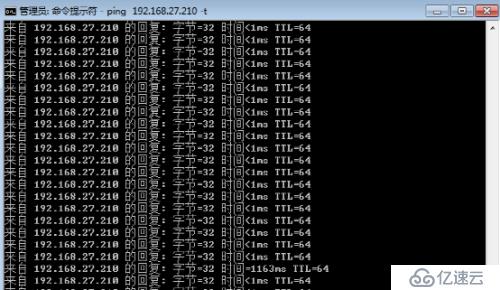
再次訪問VIP成功:


VIP已經轉移動192.168.26.211上:

恢復192.168.26.210keepalived觀察
:vip沒有自動轉移回192.168.26.210 這和我們的設置參數有關。
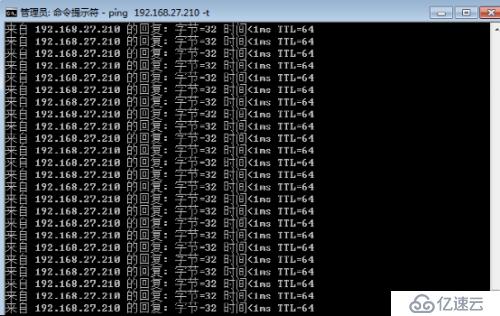
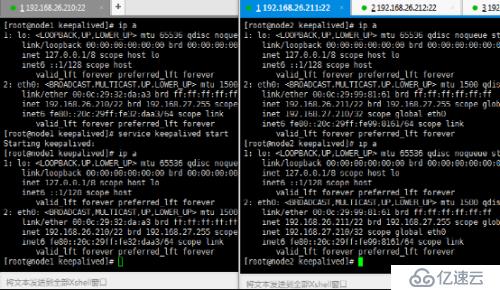
本試驗keepalived配置中涉及幾個重要參數,nopreempt state MASTER/ state BACKUP priority 可以更改其設置觀察其變化,適應不同場景中的應用。
看了以上關于HAproxy+Keepalived負載均衡-高可用web站詳細流程介紹,如果大家還有什么地方需要了解的可以在億速云行業資訊里查找自己感興趣的或者找我們的專業技術工程師解答的,億速云技術工程師在行業內擁有十幾年的經驗了。
免責聲明:本站發布的內容(圖片、視頻和文字)以原創、轉載和分享為主,文章觀點不代表本網站立場,如果涉及侵權請聯系站長郵箱:is@yisu.com進行舉報,并提供相關證據,一經查實,將立刻刪除涉嫌侵權內容。