您好,登錄后才能下訂單哦!
您好,登錄后才能下訂單哦!
這篇文章主要介紹“如何使用Bpytop工具”,在日常操作中,相信很多人在如何使用Bpytop工具問題上存在疑惑,小編查閱了各式資料,整理出簡單好用的操作方法,希望對大家解答”如何使用Bpytop工具”的疑惑有所幫助!接下來,請跟著小編一起來學習吧!
Bpytop是一款功能強大的Linux/OSX/FreeBSD資源監控工具,該工具可以顯示目標系統中的資源用量和處理器狀態,其中包括內存用量、磁盤空間、網絡流量和進程狀態。
易于使用,帶有一個交互性極強的菜單系統;
完整的鼠標支持,所有的按鈕都高亮顯示并且可點擊,還支持鼠標滾動進程列表以及菜單欄;
快速響應式UI,可使用小鍵盤上下鍵切換進程;
可顯示選中進程的完整狀態信息;
支持過濾進程,支持多重過濾;
可輕松切換排序選項;
可向選中進程發送SIGTERM、SIGKILL和SIGINT;
提供了UI菜單來修改所有的配置文件;
自動生成可縮放的網絡用量圖;
如果檢測到了新版本,則會在工具菜單中顯示;
顯示磁盤當前的讀寫速度;
Bpytop使用的主題文件跟bashtop相同,所以bashtop支持的主題文件Bpytop也可以使用。點擊【這里】查看所有支持的主題文件。
如果使用make install命令安裝的話,主題文件會默認存放在/usr/local/share/bpytop/themes中。如果使用pip3命令安裝的話,主題將會存放在一個名為bpytop-themes的目錄下。用戶自己創建的主題應該存放在$HOME/.config/bpytop/themes路徑下。
Python 3(6或更高版本);
Psutil模塊(7.0或更高版本);
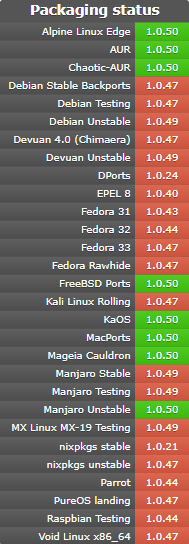
pip3 install bpytop --upgrade
https://aur.archlinux.org/packages/bpytop/
sudo apt install bpytop
sudo pkg install bpytop
sudo dnf install bpytop
sudo emerge -av sys-process/bpytop
sudo urpmi bpytop

sudo dnf install bpytop
http://mxrepo.com/mx/testrepo/pool/test/b/bpytop/
git clone https://github.com/aristocratos/bpytop.git

cd bpytop

sudo make install
sudo make uninstall
該工具所有的配置選項都可以通過UI界面來進行配置和修改,其中的配置文件存儲在"$HOME/.config/bpytop"目錄中。配置文件將自動生成,文件名為bpytop.cfg(/etc/bpytop.conf將作為配置文件生成的默認種子):
#? Config file for bpytop v. 1.0.22


#* Color theme, looks for a .theme file in "/usr/[local/]share/bpytop/themes" and "~/.config/bpytop/themes", "Default" for builtin default theme.

#* Prefix name by a plus sign (+) for a theme located in user themes folder, i.e. color_theme="+monokai"

color_theme="Default"


#* If the theme set background should be shown, set to False if you want terminal background transparency

theme_background=False


#* Set bpytop view mode, "full" for everything shown, "proc" for cpu stats and processes, "stat" for cpu, mem, disks and net stats shown.

view_mode=full


#* Update time in milliseconds, increases automatically if set below internal loops processing time, recommended 2000 ms or above for better sample times for graphs.

update_ms=2000


#* Processes sorting, "pid" "program" "arguments" "threads" "user" "memory" "cpu lazy" "cpu responsive",

#* "cpu lazy" updates top process over time, "cpu responsive" updates top process directly.

proc_sorting="cpu lazy"


#* Reverse sorting order, True or False.

proc_reversed=False


#* Show processes as a tree

proc_tree=False


#* Use the cpu graph colors in the process list.

proc_colors=True


#* Use a darkening gradient in the process list.

proc_gradient=True


#* If process cpu usage should be of the core it's running on or usage of the total available cpu power.

proc_per_core=True


#* Show process memory as bytes instead of percent

proc_mem_bytes=True


#* Check cpu temperature, needs "osx-cpu-temp" on MacOS X.

check_temp=True


#* Draw a clock at top of screen, formatting according to strftime, empty string to disable.

draw_clock="%X"


#* Update main ui in background when menus are showing, set this to false if the menus is flickering too much for comfort.

background_update=True


#* Custom cpu model name, empty string to disable.

custom_cpu_name=""


#* Optional filter for shown disks, should be last folder in path of a mountpoint, "root" replaces "/", separate multiple values with comma.

#* Begin line with "exclude=" to change to exclude filter, oterwise defaults to "most include" filter. Example: disks_filter="exclude=boot, home"

disks_filter=""


#* Show graphs instead of meters for memory values.

mem_graphs=True


#* If swap memory should be shown in memory box.

show_swap=True


#* Show swap as a disk, ignores show_swap value above, inserts itself after first disk.

swap_disk=True


#* If mem box should be split to also show disks info.

show_disks=True


#* Set fixed values for network graphs, default "10M" = 10 Mibibytes, possible units "K", "M", "G", append with "bit" for bits instead of bytes, i.e "100mbit"

net_download="100Mbit"

net_upload="100Mbit"


#* Start in network graphs auto rescaling mode, ignores any values set above and rescales down to 10 Kibibytes at the lowest.

net_auto=True


#* Sync the scaling for download and upload to whichever currently has the highest scale

net_sync=False


#* If the network graphs color gradient should scale to bandwith usage or auto scale, bandwith usage is based on "net_download" and "net_upload" values

net_color_fixed=False


#* Show init screen at startup, the init screen is purely cosmetical

show_init=False


#* Enable check for new version from github.com/aristocratos/bpytop at start.

update_check=True


#* Set loglevel for "~/.config/bpytop/error.log" levels are: "ERROR" "WARNING" "INFO" "DEBUG".

#* The level set includes all lower levels, i.e. "DEBUG" will show all logging info.

log_level=WARNING
USAGE: bpytop [argument]


Arguments:

    -f, --full            Start in full mode showing all boxes [default]

    -p, --proc            Start in minimal mode without memory and net boxes

    -s, --stat            Start in minimal mode without process box

    -v, --version         Show version info and exit

    -h, --help            Show this help message and exit

    --debug               Start with loglevel set to DEBUG overriding value set in config
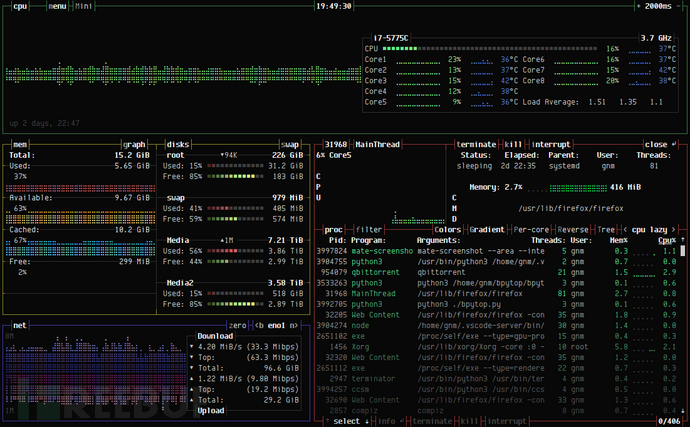
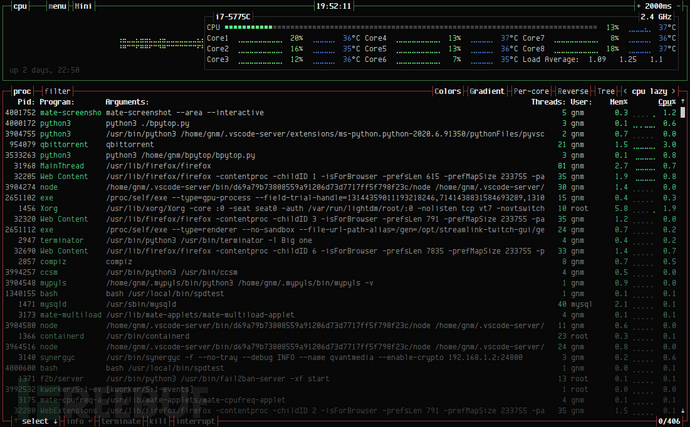
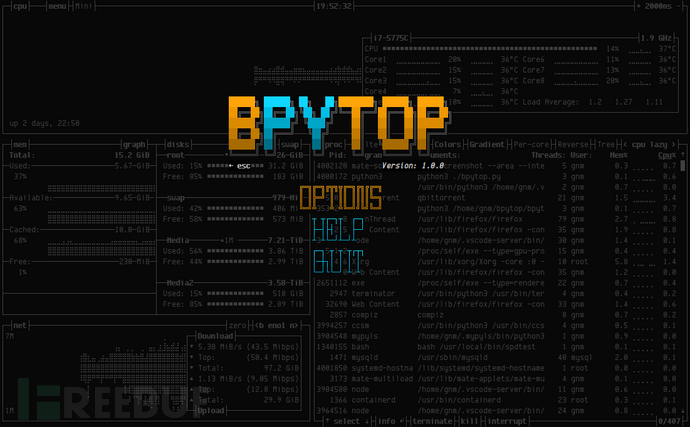
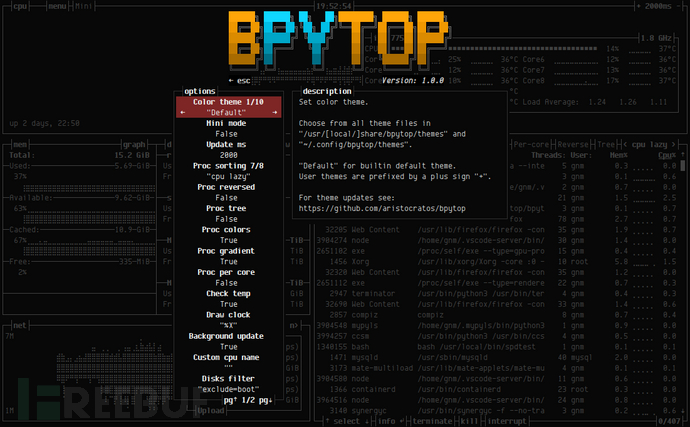
到此,關于“如何使用Bpytop工具”的學習就結束了,希望能夠解決大家的疑惑。理論與實踐的搭配能更好的幫助大家學習,快去試試吧!若想繼續學習更多相關知識,請繼續關注億速云網站,小編會繼續努力為大家帶來更多實用的文章!
免責聲明:本站發布的內容(圖片、視頻和文字)以原創、轉載和分享為主,文章觀點不代表本網站立場,如果涉及侵權請聯系站長郵箱:is@yisu.com進行舉報,并提供相關證據,一經查實,將立刻刪除涉嫌侵權內容。