您好,登錄后才能下訂單哦!
您好,登錄后才能下訂單哦!
這篇文章主要介紹“Vue.js的作用域插槽的介紹以及使用場景”,在日常操作中,相信很多人在Vue.js的作用域插槽的介紹以及使用場景問題上存在疑惑,小編查閱了各式資料,整理出簡單好用的操作方法,希望對大家解答”Vue.js的作用域插槽的介紹以及使用場景”的疑惑有所幫助!接下來,請跟著小編一起來學習吧!
作用域插槽是 Vue.js 中一個很有用的特性,可以顯著提高組件的通用性和可復用性。問題在于,它實在不太好理解。嘗試搞清楚父子作用域之間錯綜復雜的關系,其痛苦程度不亞于求解一個棘手的數學方程。
當你無法理解一個東西的時候,最好的辦法就是在解決問題的過程中體會它的應用。本文將向你展示如何使用作用域插槽構建一個可復用的列表組件。

注意: 完整代碼可以去 Codepen 查看
最基礎的組件
我們即將構建的組件叫做 my-list ,用來展示一系列的項目。它的特別之處就在于,你可以在每次使用組件的時候自定義列表項目的渲染方式。
我們先從最簡單的單個列表開始:一個包含幾何圖形名字和邊數的數組。
app.js
Vue.component('my-list', { template: '#my-list', data() { return { title: 'Shapes', shapes: [ { name: 'Square', sides: 4 }, { name: 'Hexagon', sides: 6 }, { name: 'Triangle', sides: 3 } ] }; } }); new Vue({ el: '#app' });index.html
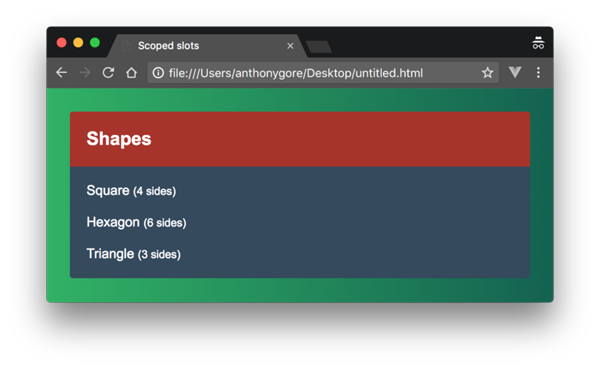
<div id="app"> <my-list></my-list> </div> <script type="text/x-template" id="my-list"> <div class="my-list"> <div class="title">{{ title }}</div> <div class="list"> <div class="list-item" v-for="shape in shapes"> <div>{{ shape.name }} <small>({{ shape.sides }} sides)</small></div> </div> </div> </div> </script>在加上一點樣式,大概就會是下圖這個樣子:

更通用的 my-list
現在我們想要讓 my-list 更加通用,可以渲染任何類型的列表。這次我們展示的是一堆顏色的名字以及對應的顏色方塊。
為此,我們需要將上例列表獨有的數據進行抽象化。由于列表中的項目可能有不同的結構,我們將會給 my-list 一個插槽,讓父組件來定義列表的展示方式。
app.js
Vue.component('my-list', { template: '#my-list', props: [ 'title' ] });index.html
<script type="text/x-template" id="my-list"> <div class="my-list"> <div class="title">{{ title }}</div> <div class="list"> <slot></slot> </div> </div> </script>現在,我們在根實例中創建 my-list 組件的兩個實例,分別展示兩個測試用例列表:lists:
app.js
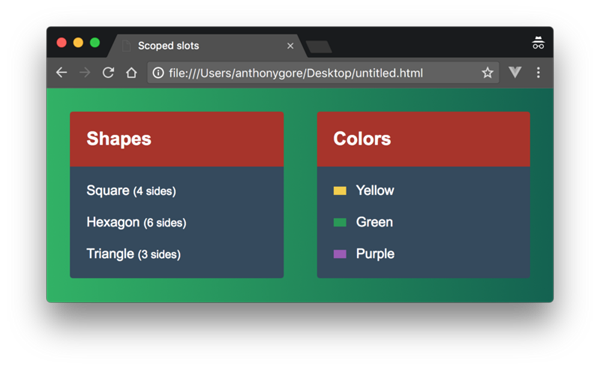
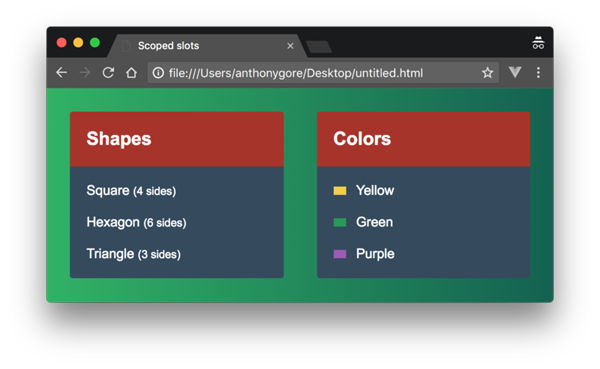
new Vue({ el: '#app', data: { shapes: [ { name: 'Square', sides: 4 }, { name: 'Hexagon', sides: 6 }, { name: 'Triangle', sides: 3 } ], colors: [ { name: 'Yellow', hex: '#F4D03F', }, { name: 'Green', hex: '#229954' }, { name: 'Purple', hex: '#9B59B6' } ] } });<div id="app"> <my-list :title="Shapes"> <div class="list-item" v-for="item in shapes"> <div>{{ shape.name }} <small>({{ shape.sides }} sides)</small></div> </div> </my-list> <my-list :title="Colors"> <div class="list-item" v-for="color in colors"> <div> <div class="swatch" :style="{ background: color.hex }"></div> {{ color.name }} </div> </div> </my-list> </div>效果如下圖:

大材小用的組件
我們剛才創建的組件確實符合要求,但那段代碼算不上很好。my-list 本來應該是一個展示列表的組件,但我們卻把渲染列表需要的邏輯部分抽象到了父組件中,這樣一來,子組件在這里只不過是用來包裹列表而已,未免顯得大材小用了。
更糟糕的是,在兩個組件的聲明中存在著大量重復代碼(例如,<div class="list-item" v-for="item in ...">)。如果我們能夠在子組件中編寫這些代碼,那么子組件就不再是“打醬油的角色”了。
作用域插槽
普通插槽無法滿足我們的需求,這時候,作用域插槽就派上用場了。作用域插槽允許你傳遞一個模板而不是已經渲染好的元素給插槽。之所以叫做”作用域“插槽,是因為模板雖然是在父級作用域中渲染的,卻能拿到子組件的數據。
例如,帶有作用域插槽的組件 child 大概是下面這個樣子:
<div> <slot my-prop="Hello from child"></slot> </div>
使用這個組件的父組件將會在插槽中聲明一個 template 元素。這個模板元素會有一個 scope (譯者注:Vue 2.6 后改為 v-slot 屬性)屬性指向一個對象,任何添加到插槽(位于子組件模板)中的屬性都會作為這個對象的屬性。
<child> <template scope="props"> <span>Hello from parent</span> <span>{{ props.my-prop }}</span> </template> </child>將會渲染成:
<div> <span>Hello from parent</span> <span>Hello from child</span> </div>
在 my-list 中使用作用域插槽
我們將兩個列表數組通過 props 傳遞給 my-list。之后將普通插槽替換為作用域插槽,這樣,my-list 就能夠負責迭代列表項目,同時父組件依然能夠定義每個項目具體的展示方式。
index.html
<div id="app"> <my-list title="Shapes" :items="shapes"> <!--在這里書寫 template--> </my-list> <my-list title="Colors" :items="colors"> <!--在這里書寫 template--> </my-list> </div>
接著我們讓 my-list 迭代項目。在 v-for 循環中,item 是當前迭代項目的別名。我們可以創建一個插槽并通過 v-bind="item" 將那個項目綁定到插槽中。
app.js
Vue.component('my-list', { template: '#my-list', props: [ 'title', 'items' ] });index.html
<script type="text/x-template" id="my-list"> <div class="my-list"> <div class="title">{{ title }}</div> <div class="list"> <div v-for="item in items"> <slot v-bind="item"></slot> </div> </div> </div> </script>注意:也許你之前沒見過不帶參數的 v-bind 用法。這種用法將會把整個對象的所以屬性都綁定到當前元素上。在涉及作用域插槽時,這種用法很常見,因為綁定的對象可能有很多屬性,而一一將它們列舉出來并手動綁定顯然太麻煩了。
現在,回到根實例這里來,在 my-list 的插槽中聲明一個模板。首先看一下幾何圖形列表(第一個例子中的列表),我們聲明的模板必須帶有一個 scope 屬性,這里將其賦值為 shape。shape 這個別名可以讓我們訪問作用域插槽。在模板中,我們可以繼續沿用最初例子中的標記來展示項目。
<my-list title="Shapes" :items="shapes"> <template scope="shape"> <div>{{ shape.name }} <small>({{ shape.sides }} sides)</small></div> </template> </my-list>整個模板大概是下面這樣:
<div id="app"> <my-list title="Shapes" :items="shapes"> <template scope="shape"> <div>{{ shape.name }} <small>({{ shape.sides }} sides)</small></div> </template> </my-list> <my-list title="Colors" :items="colors"> <template scope="color"> <div> <div class="swatch" :style="{ background: color.hex }"></div> {{ color.name }} </div> </template> </my-list> </div>結論
雖然用上作用域插槽之后,代碼量并未減少,但是我們將通用的功能都交由子組件負責,這顯著提高了代碼的健壯性。
到此,關于“Vue.js的作用域插槽的介紹以及使用場景”的學習就結束了,希望能夠解決大家的疑惑。理論與實踐的搭配能更好的幫助大家學習,快去試試吧!若想繼續學習更多相關知識,請繼續關注億速云網站,小編會繼續努力為大家帶來更多實用的文章!
免責聲明:本站發布的內容(圖片、視頻和文字)以原創、轉載和分享為主,文章觀點不代表本網站立場,如果涉及侵權請聯系站長郵箱:is@yisu.com進行舉報,并提供相關證據,一經查實,將立刻刪除涉嫌侵權內容。