您好,登錄后才能下訂單哦!
您好,登錄后才能下訂單哦!
基于HTML5的人臉識別技術是怎樣的,很多新手對此不是很清楚,為了幫助大家解決這個難題,下面小編將為大家詳細講解,有這方面需求的人可以來學習下,希望你能有所收獲。
然后打開下面地址:
http://neave.com/webcam/html5/face/
當你搖頭晃腦的時候,那副眼鏡會跟著移動并幫你戴上眼鏡。
你可以查看網頁源碼來了解具體的實現細節。
———————————–我是分界線———————————————
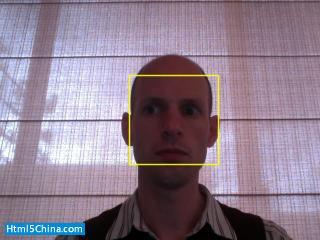
這是一篇國外的文章,介紹如何通過 WebRTC、OpenCV 和 WebSocket 技術實現在 Web 瀏覽器上的人臉識別,架構在 Jetty 之上。
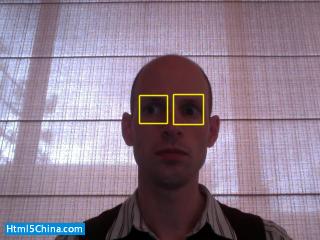
實現的效果包括:

還能識別眼睛

人臉識別的核心代碼:
頁面:
XML/HTML
<div> <videoidvideoid="live"width="320"height="240" autoplay style="display: inline;"></video> <canvaswidthcanvaswidth="320"id="canvas"height="240"style="display: inline;"></canvas> </div> <scripttypescripttype="text/javascript"> var video = $("#live").get()[0]; var canvas = $("#canvas"); var ctx = canvas.get()[0].getContext('2d'); navigator.webkitGetUserMedia("video", function(stream) { video.src = webkitURL.createObjectURL(stream); }, function(err) { console.log("Unable to get video stream!") } ) timer = setInterval( function () { ctx.drawImage(video, 0, 0, 320, 240); }, 250); </script>JavaScript
publicclass FaceDetection { privatestaticfinal String CASCADE_FILE ="resources/haarcascade_frontalface_alt.xml"; privateint minsize = 20; privateint group = 0; privatedouble scale = 1.1; /** * Based on FaceDetection example from JavaCV. */ publicbyte[] convert(byte[] imageData) throws IOException { // create image from supplied bytearray IplImage originalImage = cvDecodeImage(cvMat(1, imageData.length,CV_8UC1, newBytePointer(imageData))); // Convert to grayscale for recognition IplImage grayImage = IplImage.create(originalImage.width(), originalImage.height(), IPL_DEPTH_8U, 1); cvCvtColor(originalImage, grayImage, CV_BGR2GRAY); // storage is needed to store information during detection CvMemStorage storage = CvMemStorage.create(); // Configuration to use in analysis CvHaarClassifierCascade cascade = newCvHaarClassifierCascade(cvLoad(CASCADE_FILE)); // We detect the faces. CvSeq faces = cvHaarDetectObjects(grayImage, cascade, storage, scale, group, minsize); // We iterate over the discovered faces and draw yellow rectangles around them. for (int i = 0; i < faces.total(); i++) { CvRect r = new CvRect(cvGetSeqElem(faces, i)); cvRectangle(originalImage, cvPoint(r.x(), r.y()), cvPoint(r.x() + r.width(), r.y() + r.height()), CvScalar.YELLOW, 1, CV_AA, 0); } // convert the resulting image back to an array ByteArrayOutputStream bout = new ByteArrayOutputStream(); BufferedImage imgb = originalImage.getBufferedImage(); ImageIO.write(imgb, "png", bout); return bout.toByteArray(); } }看完上述內容是否對您有幫助呢?如果還想對相關知識有進一步的了解或閱讀更多相關文章,請關注億速云行業資訊頻道,感謝您對億速云的支持。
免責聲明:本站發布的內容(圖片、視頻和文字)以原創、轉載和分享為主,文章觀點不代表本網站立場,如果涉及侵權請聯系站長郵箱:is@yisu.com進行舉報,并提供相關證據,一經查實,將立刻刪除涉嫌侵權內容。