您好,登錄后才能下訂單哦!
您好,登錄后才能下訂單哦!
這篇文章將為大家詳細講解有關利用R語言怎么繪制一個折線圖,文章內容質量較高,因此小編分享給大家做個參考,希望大家閱讀完這篇文章后對相關知識有一定的了解。
R語言中的plot()函數用于創建折線圖。
在R語言中創建折線圖的基本語法是 -
plot(v,type,col,xlab,ylab)
以下是所使用的參數的描述 -
v是包含數值的向量。
類型采用值“p”僅繪制點,“l”僅繪制線和“o”繪制點和線。
xlab是x軸的標簽。
ylab是y軸的標簽。
main是圖表的標題。
col用于給點和線的顏色。
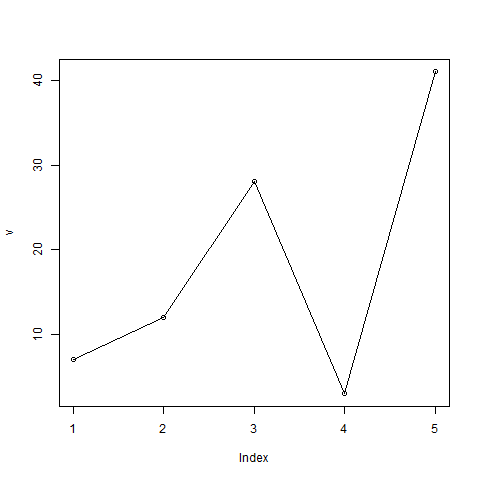
使用輸入向量和類型參數“O”創建簡單的折線圖。 以下腳本將在當前R工作目錄中創建并保存折線圖。
# Create the data for the chart.
v <- c(7,12,28,3,41)

# Give the chart file a name.
png(file = "line_chart.jpg")

# Plot the bar chart.
plot(v,type = "o")

# Save the file.
dev.off()
當我們執行上面的代碼,它產生以下結果 -

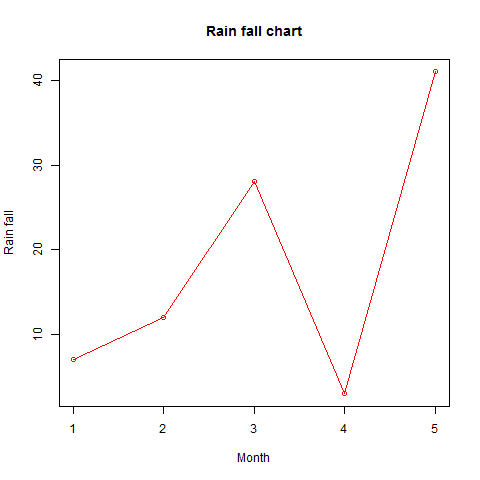
線圖的特征可以通過使用附加參數來擴展。 我們向點和線添加顏色,為圖表添加標題,并向軸添加標簽。
# Create the data for the chart.
v <- c(7,12,28,3,41)

# Give the chart file a name.
png(file = "line_chart_label_colored.jpg")

# Plot the bar chart.
plot(v,type = "o", col = "red", xlab = "Month", ylab = "Rain fall",
   main = "Rain fall chart")

# Save the file.
dev.off()
當我們執行上面的代碼,它產生以下結果 -

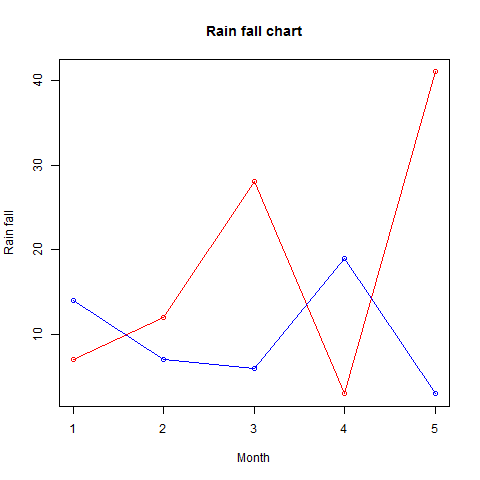
通過使用lines()函數,可以在同一個圖表上繪制多條線。
在繪制第一行之后,lines()函數可以使用一個額外的向量作為輸入來繪制圖表中的第二行。
# Create the data for the chart.
v <- c(7,12,28,3,41)
t <- c(14,7,6,19,3)

# Give the chart file a name.
png(file = "line_chart_2_lines.jpg")

# Plot the bar chart.
plot(v,type = "o",col = "red", xlab = "Month", ylab = "Rain fall",
   main = "Rain fall chart")

lines(t, type = "o", col = "blue")

# Save the file.
dev.off()
當我們執行上面的代碼,它產生以下結果 -

關于利用R語言怎么繪制一個折線圖就分享到這里了,希望以上內容可以對大家有一定的幫助,可以學到更多知識。如果覺得文章不錯,可以把它分享出去讓更多的人看到。
免責聲明:本站發布的內容(圖片、視頻和文字)以原創、轉載和分享為主,文章觀點不代表本網站立場,如果涉及侵權請聯系站長郵箱:is@yisu.com進行舉報,并提供相關證據,一經查實,將立刻刪除涉嫌侵權內容。