您好,登錄后才能下訂單哦!
您好,登錄后才能下訂單哦!
這篇文章將為大家詳細講解有關SAP Cloud Platform integration上怎樣創建一個最簡單的iFlow,文章內容質量較高,因此小編分享給大家做個參考,希望大家閱讀完這篇文章后對相關知識有一定的了解。
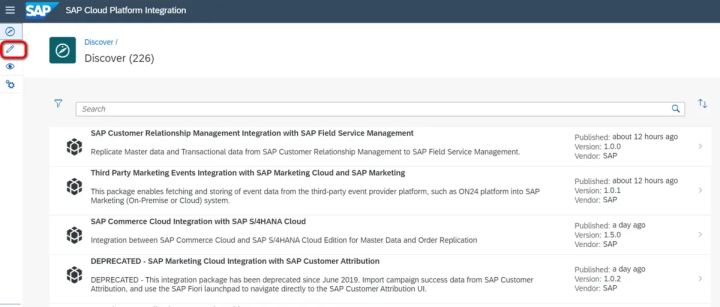
登錄SAP CPI控制臺,點擊這個鉛筆圖標進入工作區域:
選擇一個已經存在的content package:

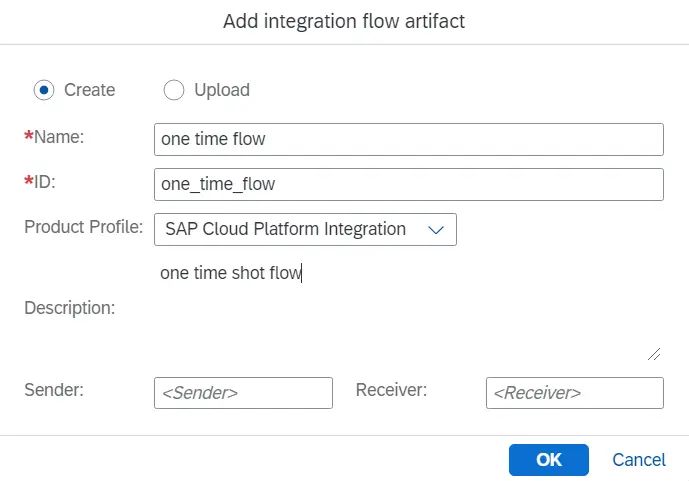
在這個content package里創建一個新的iFlow:

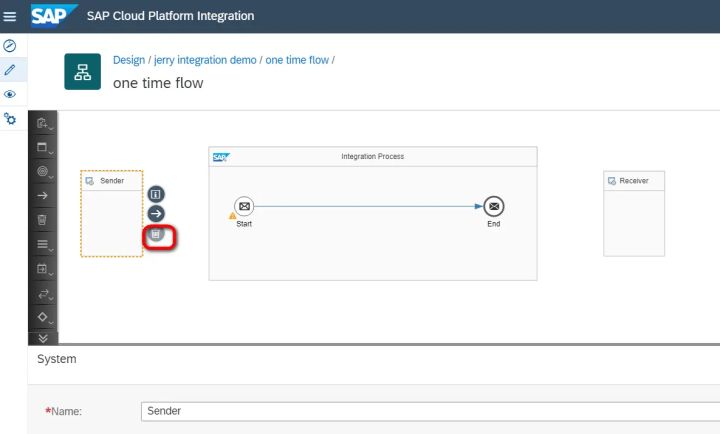
默認生成的iFlow模型如下。刪除Sender,因為在這個最簡單的iFlow里,我們采用timer方式觸發:
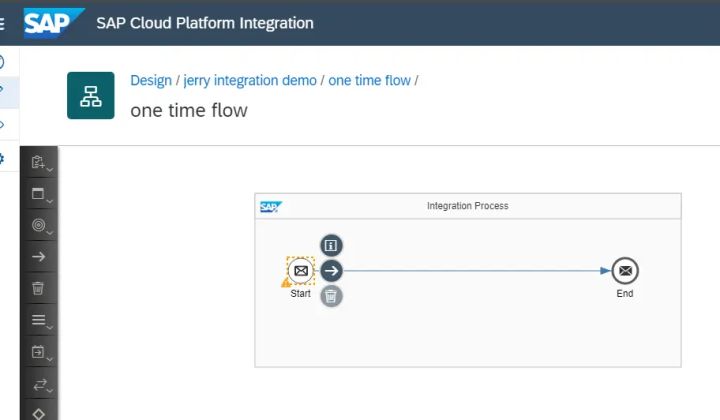
刪除Sender后如下圖所示:
選擇一個Timer作為iFlow觸發器:
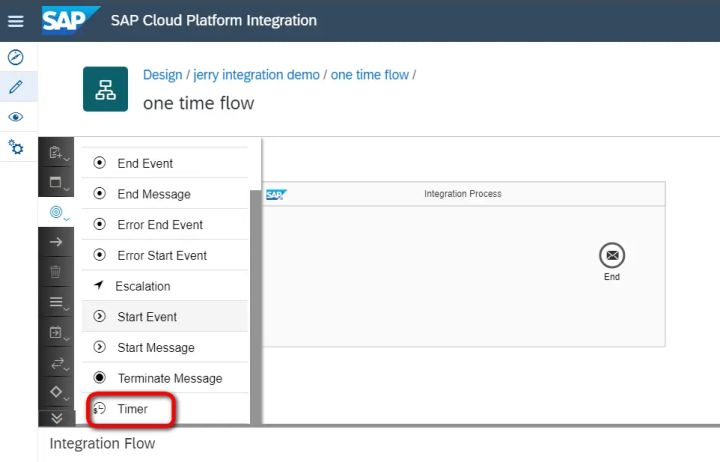
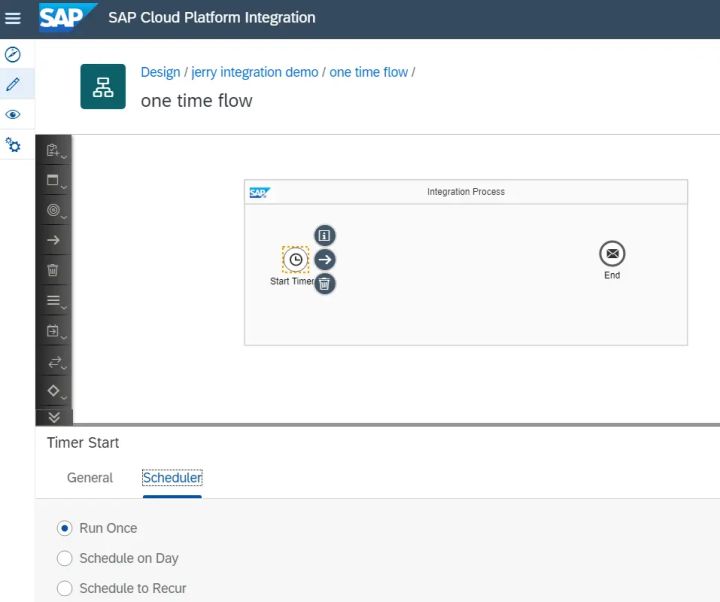
將tinmer拖拽到integration process區域,選擇Scheduler屬性,設置成Run Once-運行一次。
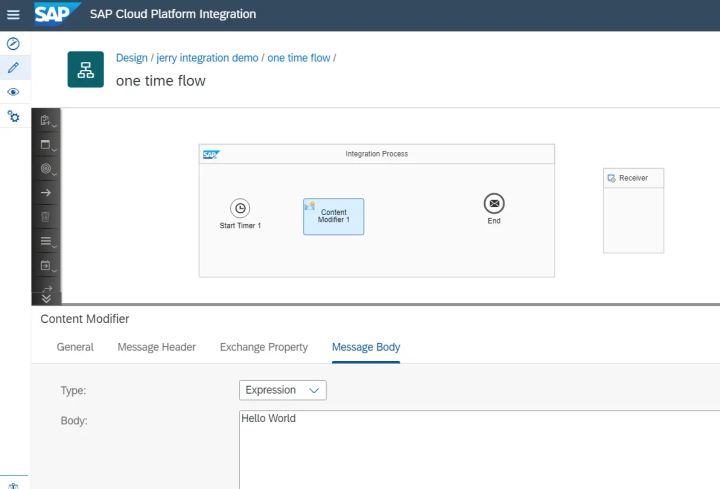
再拖拽一個Content Modifier到integration process區域,切換到message body,維護一個Hello World:
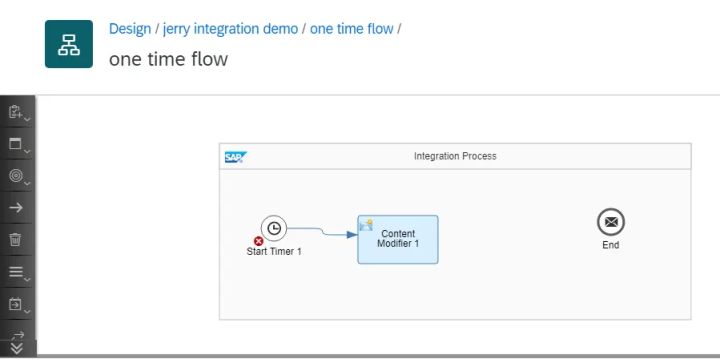
將start timer同content modifier連接起來:
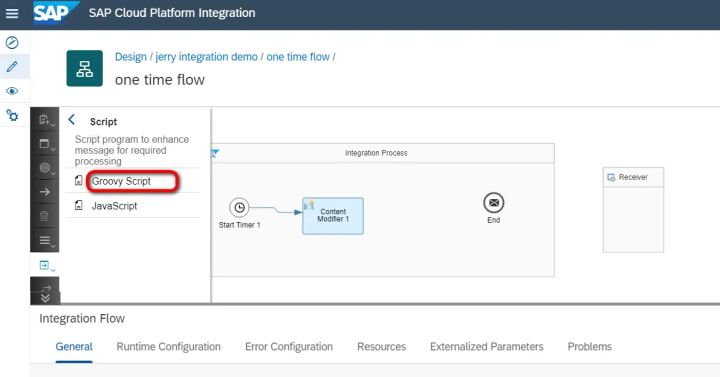
添加一個groovy script:
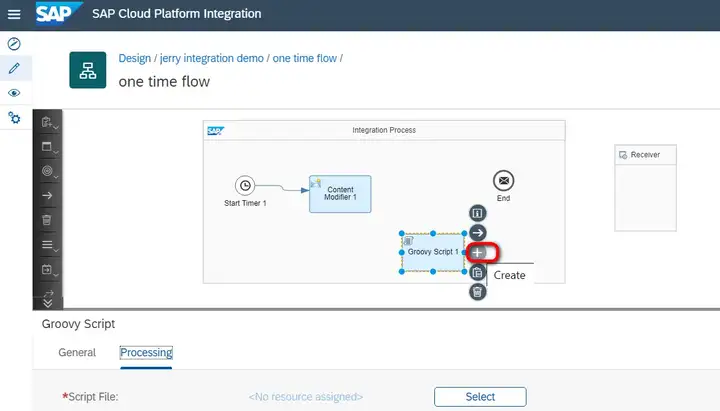
點擊script步驟的create標簽:
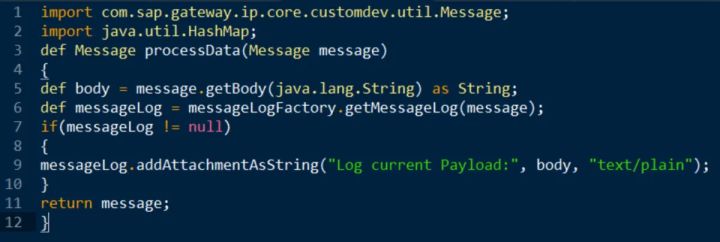
本地新建一個文本文件,將下列groovy代碼粘貼進去,另存為test.groovy:
import com.sap.gateway.ip.core.customdev.util.Message; import java.util.HashMap; def Message processData(Message message) { def body = message.getBody(java.lang.String) as String; def messageLog = messageLogFactory.getMessageLog(message); if(messageLog != null) { messageLog.addAttachmentAsString("Log current Payload:", body, "text/plain"); } return message; }
將本地groovy文件上傳到script步驟里:
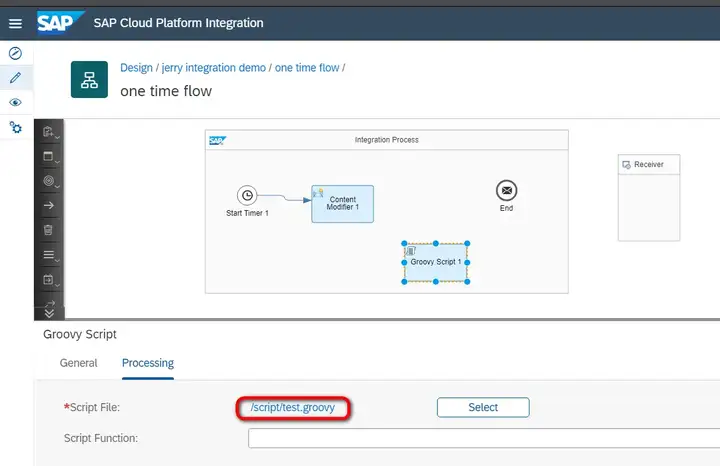
再將Content modifier同Groovy Script連接起來,最近進行部署。
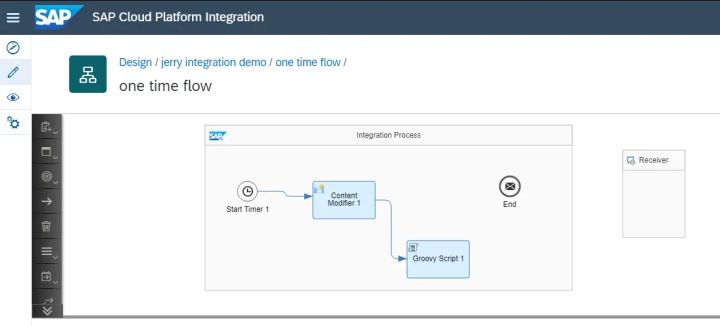
部署成功后,到operation視圖查看剛剛部署的iFlow的執行情況。點擊tile “All Integration Flows”:
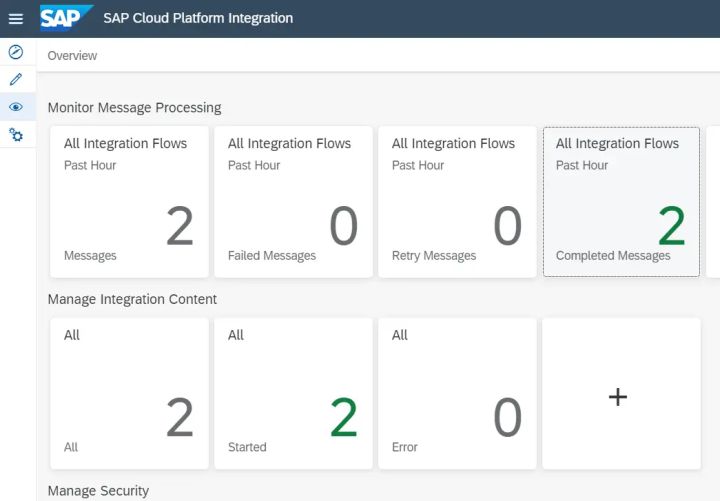
狀態:成功執行

在attachment區域能看到之前用groovy script存儲的附件:
messageLog.addAttachmentAsString("Log current Payload:", body, "text/plain");
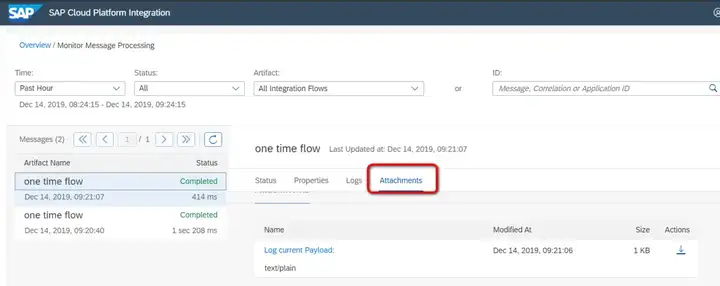
這個最簡單的iFlow展示到此就成功了:
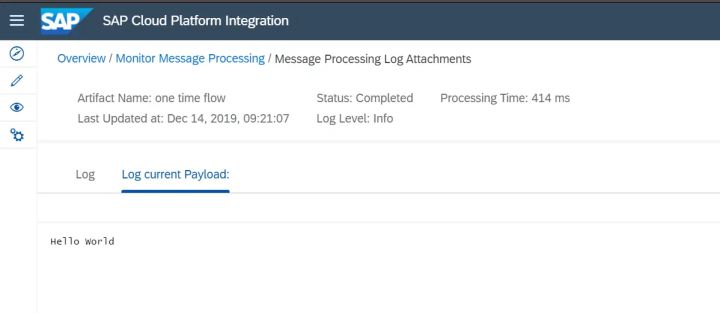
關于SAP Cloud Platform integration上怎樣創建一個最簡單的iFlow就分享到這里了,希望以上內容可以對大家有一定的幫助,可以學到更多知識。如果覺得文章不錯,可以把它分享出去讓更多的人看到。
免責聲明:本站發布的內容(圖片、視頻和文字)以原創、轉載和分享為主,文章觀點不代表本網站立場,如果涉及侵權請聯系站長郵箱:is@yisu.com進行舉報,并提供相關證據,一經查實,將立刻刪除涉嫌侵權內容。