您好,登錄后才能下訂單哦!
您好,登錄后才能下訂單哦!
這篇文章給大家介紹prometheus如何配置MySQL郵件報警,內容非常詳細,感興趣的小伙伴們可以參考借鑒,希望對大家能有所幫助。
這里介紹一下prometheus的郵件報警配置。
alertmanager下載
prometheus報警配置需要用到alertmanager組件,這個組件可以到prometheus官網上進行下載。
https://prometheus.io/download/

由于最新版本的alertmanager組件配置郵箱通訊存在一些問題,我們這里選擇在github上下載0.14版本的alertmanager。
https://github.com/prometheus/alertmanager
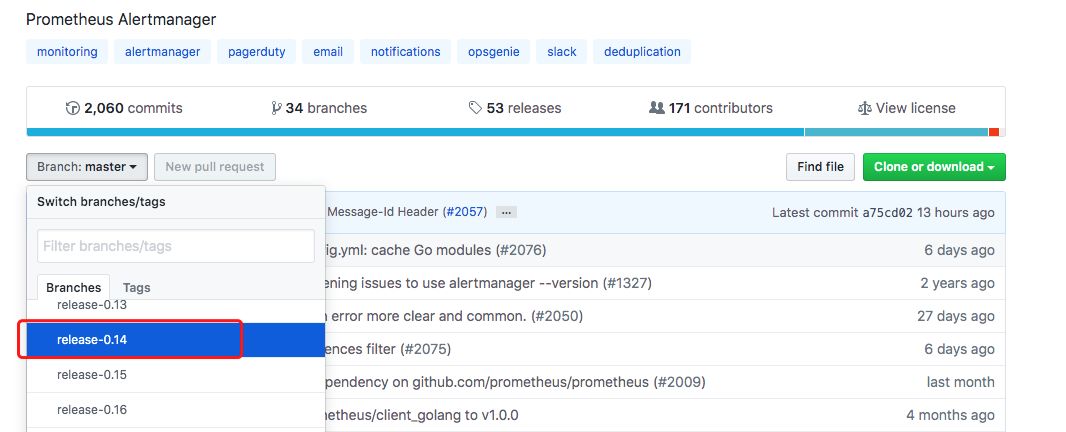
附具體下載地址:
https://github.com/prometheus/alertmanager/releases/download/v0.14.0/alertmanager-0.14.0.linux-amd64.tar.gz
alertmanager安裝配置
將下載的alertmanager包進行解壓安裝。
tar -xf alertmanager-0.14.0.linux-amd64.tar.gz
mv alertmanager-0.14.0.linux-amd64 /data/alertmanager
編輯alertmanager的配置文件,添加郵箱信息。
# cd /data/alertmanager
# cat alertmanager.yml
global:
  smtp_smarthost: smtp.exmail.xxx.com:465 # 發件人郵箱smtp地址
  smtp_auth_username: xxxx@xxx.com # 發件人郵箱賬號
  smtp_from: xxx@xxx.com # 發件人郵箱賬號
  smtp_auth_password: xxxxxx # 發件人郵箱密碼
  resolve_timeout: 5m
  smtp_require_tls: false
route:
  # group_by: ['alertname'] # 報警分組依據
  group_wait: 10s # 最初即第一次等待多久時間發送一組警報的通知
  group_interval: 10s # 在發送新警報前的等待時間
  repeat_interval: 1m # 發送重復警報的周期 對于email配置中多頻繁
  receiver: 'email'
receivers:
- name: email
  email_configs:
  - send_resolved: true
    to: xxx@xxx.com # 收件人郵箱賬號
啟動alertmanager。
# cd /data/alertmanager
./alertmanager --config.file=alertmanager.yml &
alertmanager的默認端口為9093。

prometheus配置
# cd /data/prometheus
# cat alert_rules.yml
groups:
- name: MySQL-rules
  rules:
  - alert: MySQL Status # 告警名稱
    expr: up == 0
    for: 5s # 滿足告警條件持續時間多久后,才會發送告警
    annotations: # 解析項,詳細解釋告警信息
      summary: "{{$labels.instance}}: MySQL has stop !!!"
      value: "{{$value}}"
      alertname: "MySQL數據庫停止運行"
      description: "檢測MySQL數據庫運行狀態"
      message: 當前數據庫實例{{$labels.instance}}已經停止運行,請及時處理
  - alert: MySQL Slave IO Thread Status # 告警名稱
    expr: mysql_slave_status_slave_io_running == 0
    for: 5s # 滿足告警條件持續時間多久后,才會發送告警
    annotations: # 解析項,詳細解釋告警信息
      summary: "{{$labels.instance}}: MySQL Slave IO Thread has stop !!!"
      value: "{{$value}}"
      alertname: "MySQL主從IO線程停止運行"
      description: "檢測MySQL主從IO線程運行狀態"
      message: 當前數據庫實例{{$labels.instance}} IO線程已經停止運行,請及時處理
  - alert: MySQL Slave SQL Thread Status # 告警名稱
    expr: mysql_slave_status_slave_sql_running == 0
    for: 5s # 滿足告警條件持續時間多久后,才會發送告警
    annotations: # 解析項,詳細解釋告警信息
      summary: "{{$labels.instance}}: MySQL Slave SQL Thread has stop !!!"
      value: "{{$value}}"
      alertname: "MySQL主從SQL線程停止運行"
      description: "檢測MySQL主從SQL線程運行狀態"
      message: 當前數據庫實例{{$labels.instance}} SQL線程已經停止運行,請及時處理
  - alert: MySQL Slave Delay Status # 告警名稱
    expr: mysql_slave_status_sql_delay == 30
    for: 5s # 滿足告警條件持續時間多久后,才會發送告警
    annotations: # 解析項,詳細解釋告警信息
      summary: "{{$labels.instance}}: MySQL Slave Delay has more than 30s !!!"
      value: "{{$value}}"
      alertname: "MySQL主從延時過大"
      description: "檢測MySQL主從延時狀態"
      message: 當前數據庫實例{{$labels.instance}} 主從延時狀態已經超過30s,請及時處理
在prometheus目錄下編輯prometheus的配置文件,將監控的配置信息添加到prometheus.yml。
# cd /data/prometheus
# cat prometheus.yml
# my global config
global:
  scrape_interval: 15s # Set the scrape interval to every 15 seconds. Default is every 1 minute.
  evaluation_interval: 15s # Evaluate rules every 15 seconds. The default is every 1 minute.
  # scrape_timeout is set to the global default (10s).
# Alertmanager configuration
alerting:
  alertmanagers:
  - static_configs:
    - targets:
      - 172.18.0.24:9093 # 對應啟動的altermanager節點的9093端口
# Load rules once and periodically evaluate them according to the global 'evaluation_interval'.
rule_files:
  - "alert_rules.yml" # 對應前面編輯的報警模版alert_rules.yml文件
# A scrape configuration containing exactly one endpoint to scrape:
scrape_configs:
  - file_sd_configs:
    - files:
      - mysql.yml
    job_name: MySQL
    metrics_path: /metrics
    relabel_configs:
    - source_labels: [__address__]
      regex: (.*)
      target_label: __address__
      replacement: $1
編輯完成后,重新加載一下配置更改。
kill -HUP [prometheus PID]
驗證郵件報警
登陸prometheus的web頁面,查看報警信息。
瀏覽器輸入Prometheus_IP:9090 ,可以看到各個報警項的狀態。
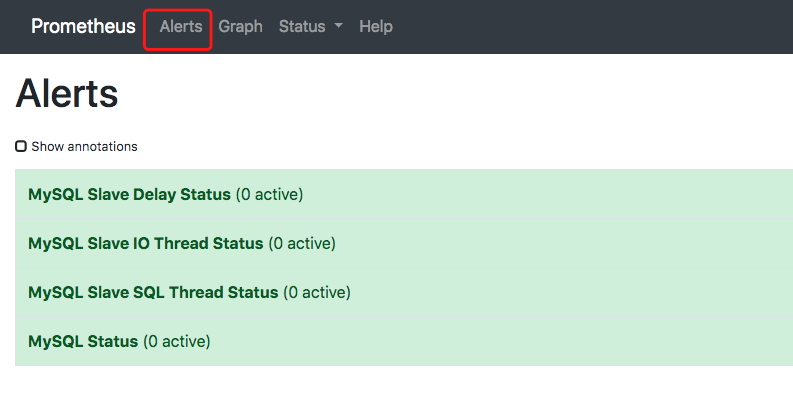
停掉主從線程,模擬觸發報警。

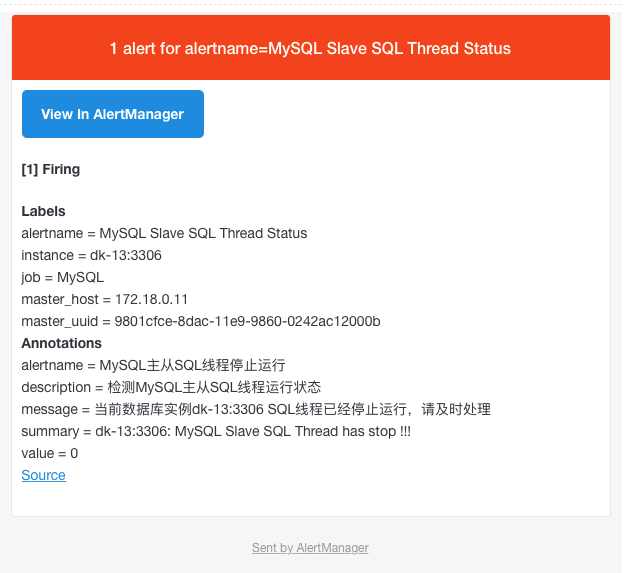
Slave SQL線程停掉后,報警項顏色變成黃色,持續時間超過定義的持續時間后,顏色變紅,并發送郵件。
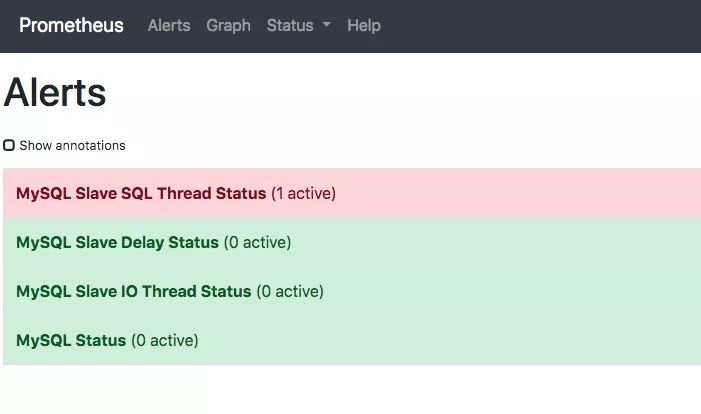
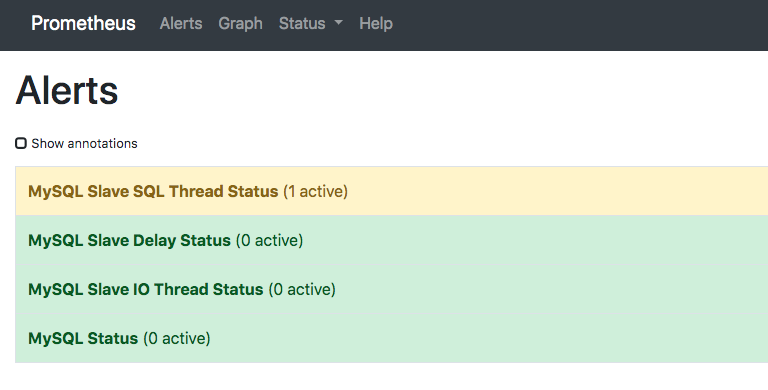
收到報警郵件。

關于prometheus如何配置MySQL郵件報警就分享到這里了,希望以上內容可以對大家有一定的幫助,可以學到更多知識。如果覺得文章不錯,可以把它分享出去讓更多的人看到。
免責聲明:本站發布的內容(圖片、視頻和文字)以原創、轉載和分享為主,文章觀點不代表本網站立場,如果涉及侵權請聯系站長郵箱:is@yisu.com進行舉報,并提供相關證據,一經查實,將立刻刪除涉嫌侵權內容。