您好,登錄后才能下訂單哦!
您好,登錄后才能下訂單哦!
在TabLayout出現之前,基本都是通過 ViewPager+FragmentPagerAdapter+第三方開源tab指示器(TabPageIndicator)來實現的。現在Android內部提供了現成的TabLayout控件來實現ViewPager指示器的效果。
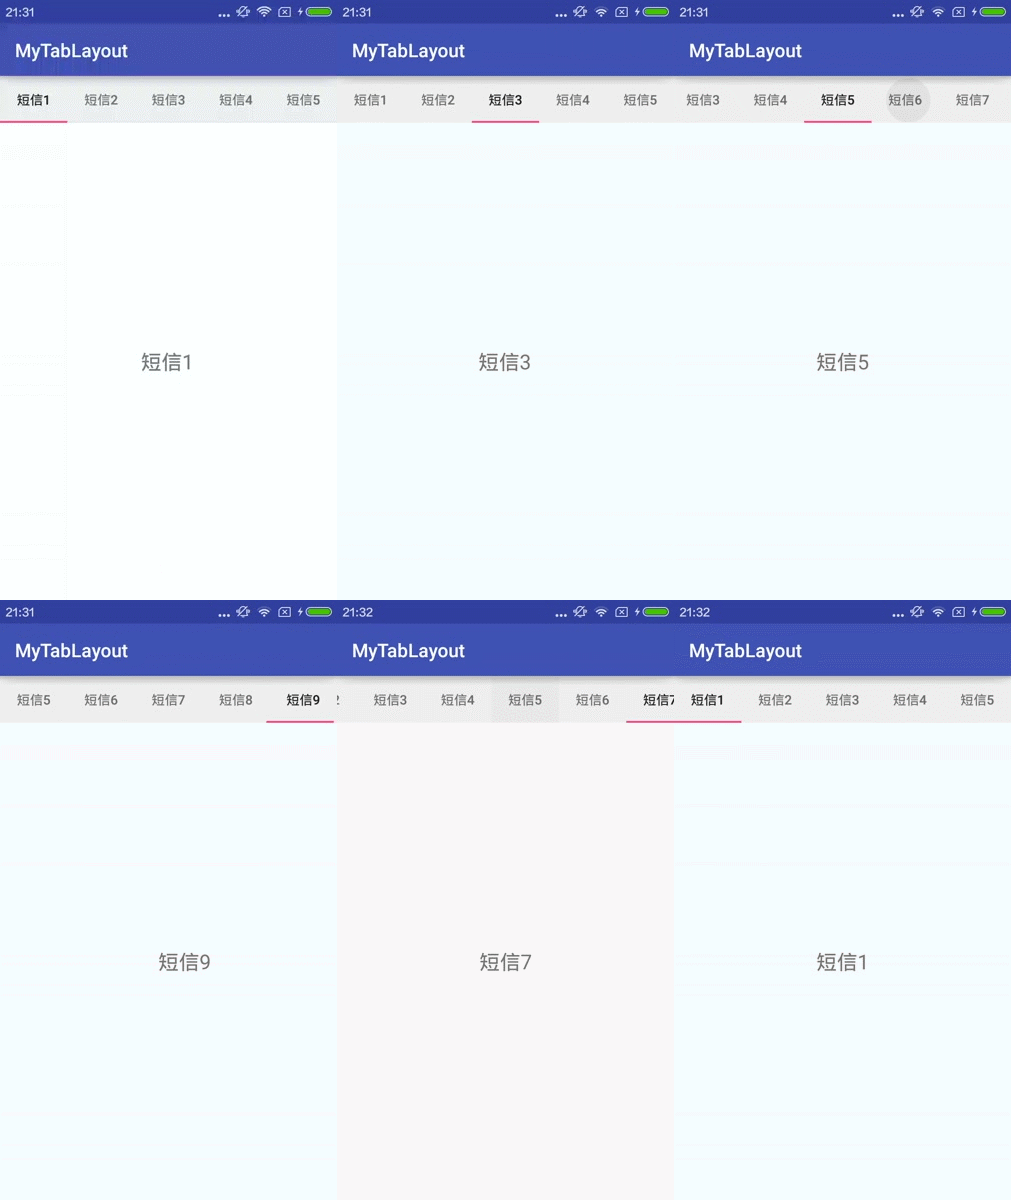
先看效果圖:

導入依賴
在Gradle文件中導入依賴,代碼如下:
compile 'com.android.support:design:23.4.0'
TabLayout類就在這個依賴包中定義的。
布局文件中使用
<LinearLayout
 xmlns:android="http://schemas.android.com/apk/res/android"
 xmlns:tools="http://schemas.android.com/tools"
 xmlns:app="http://schemas.android.com/apk/res-auto"
 android:layout_width="match_parent"
 android:layout_height="match_parent"
 android:orientation="vertical"
 tools:context="tech.czh.example.MainActivity">

 <android.support.design.widget.TabLayout
  android:id="@+id/tablayout"
  android:layout_width="match_parent"
  android:layout_height="50dp"
  android:layout_gravity="top"/>

 <android.support.v4.view.ViewPager
  android:id="@+id/viewpager"
  android:layout_width="match_parent"
  android:layout_height="match_parent"
  android:background="@android:color/white">

 </android.support.v4.view.ViewPager>

</LinearLayout>
在LinearLayout中使用TabLayout標簽和ViewPager標簽。
Activity代碼編寫
public class MainActivity extends AppCompatActivity
{

 public static final String[] tabTitles =
   new String[]{"短信1","短信2","短信3","短信4","短信5","短信6","短信7","短信8","短信9"};

 private TabLayout mTabLayout;
 private ViewPager mViewPager;

 private List<SingleFragment> mFragments = new ArrayList<SingleFragment>();

 @Override
 protected void onCreate(Bundle savedInstanceState)
 {
  super.onCreate(savedInstanceState);
  setContentView(R.layout.activity_main);

  initViews();
 }

 private void initViews()
 {
  mTabLayout = (TabLayout) findViewById(R.id.tablayout);
  mViewPager = (ViewPager) findViewById(R.id.viewpager);

  for(int i = 0; i < tabTitles.length; i++)
  {
   mFragments.add(SingleFragment.createFragment(tabTitles[i]));
  }

  //為ViewPager設置FragmentPagerAdapter
  mViewPager.setAdapter(new FragmentPagerAdapter(getSupportFragmentManager())
  {
   @Override
   public Fragment getItem(int position)
   {
    return mFragments.get(position);
   }

   @Override
   public int getCount()
   {
    return mFragments.size();
   }

   /**
    * 為TabLayout中每一個tab設置標題
    */
   @Override
   public CharSequence getPageTitle(int position)
   {
    return tabTitles[position];
   }
  });

  //TabLaout和ViewPager進行關聯
  mTabLayout.setupWithViewPager(mViewPager);
  //防止tab太多,都擁擠在一起
  mTabLayout.setTabMode(TabLayout.MODE_SCROLLABLE);
 }
}
大部分功能都在initViews()方法中實現,大致講解一下:第23,24行獲得TabLayout和ViewPager控件實例;26~29行創建了需要的Fragment實例,并保存在mFragments列表中。第32行,為ViewPager設置FragmentPagerAdapter,并通過getSupportFragmentManager()方法將FragmentManager傳遞給FragmentPagerAdapter。第50行,getPageTitle()回調函數,來為TabLayout中的Tab設置標題。第57行,將TabLayout和ViewPager進行關聯。最后,設置了TabLayout的模式,TabLayout.MODE_SCROLLABLE表示TabLayout可以滑動,這樣就可以防止過多的Tab擁擠在一屏內。
Fragment代碼編寫
public class SingleFragment extends Fragment
{
 public static final String ARGUMENT = "ARGUMENT";

 @Nullable
 @Override
 public View onCreateView(LayoutInflater inflater, ViewGroup container, Bundle savedInstanceState)
 {
  Bundle bundle = getArguments();
  String text = "";
  if(bundle != null) {
   text = bundle.getString(ARGUMENT);
  }
  TextView tv = new TextView(getActivity());
  tv.setText(text);
  tv.setTextSize(TypedValue.COMPLEX_UNIT_SP, 22);
  tv.setGravity(Gravity.CENTER);

  return tv;
 }

 public static SingleFragment createFragment(String argument)
 {
  Bundle bundle = new Bundle();
  bundle.putString(ARGUMENT, argument);

  SingleFragment fragment = new SingleFragment();
  fragment.setArguments(bundle);

  return fragment;
 }
}
Fragment的UI控件很簡單,僅僅包含一個TextView。外部通過靜態方法createFragment()用來創建Fragment實例,并且可以傳遞參數,傳遞的參數將設置到TextView中。
OK,至此TabLayout就可以正常使用了,效果就為文章開始貼的gif圖。
另外,TabLayout還提供了很多自定義屬性,讓我們自定義Tab的樣式。
示例代碼:
<LinearLayout
 xmlns:android="http://schemas.android.com/apk/res/android"
 xmlns:tools="http://schemas.android.com/tools"
 xmlns:app="http://schemas.android.com/apk/res-auto"
 android:layout_width="match_parent"
 android:layout_height="match_parent"
 android:orientation="vertical"
 tools:context="tech.czh.example.MainActivity">

 <android.support.design.widget.TabLayout
  android:id="@+id/tablayout"
  android:layout_width="match_parent"
  android:layout_height="50dp"
  android:layout_gravity="top"
  app:tabTextColor="@color/colorPrimary"
  app:tabSelectedTextColor="@color/colorAccent"
  app:tabIndicatorColor="@color/colorAccent"
  app:tabIndicatorHeight="5dp"/>

 <android.support.v4.view.ViewPager
  android:id="@+id/viewpager"
  android:layout_width="match_parent"
  android:layout_height="match_parent"
  android:background="@android:color/white">

 </android.support.v4.view.ViewPager>

</LinearLayout>
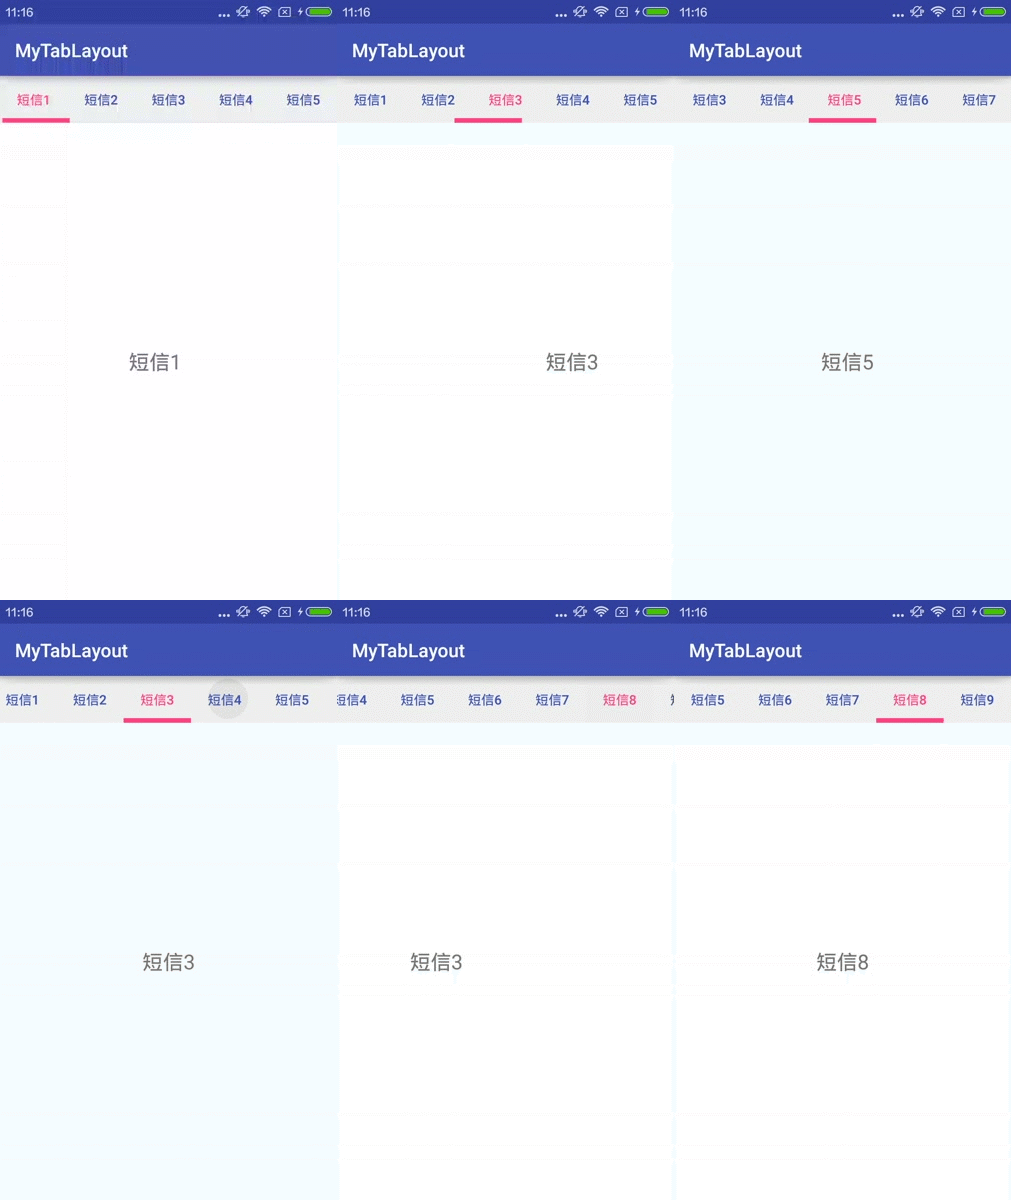
這里我們使用一些屬性,比如:tabTextColor用來設置Tab中文字顏色;
tabSelectedTextColor用來設置Tab被選中時文字顏色;tabIndicatorColor用來設置指示器顏色;tabIndicatorHeight用來設置指示器的高度。
最后,看一下效果:

好的,TabLayout的使用就說這么多。可以看出TabLayout使用起來還是很方便的,并且最終效果也很nice。
以上就是本文的全部內容,希望對大家的學習有所幫助,也希望大家多多支持億速云。
免責聲明:本站發布的內容(圖片、視頻和文字)以原創、轉載和分享為主,文章觀點不代表本網站立場,如果涉及侵權請聯系站長郵箱:is@yisu.com進行舉報,并提供相關證據,一經查實,將立刻刪除涉嫌侵權內容。