溫馨提示×
您好,登錄后才能下訂單哦!
點擊 登錄注冊 即表示同意《億速云用戶服務條款》
您好,登錄后才能下訂單哦!
HTML
非重點的代碼,比如樣式啥的,我就不放上來了,一筆帶過
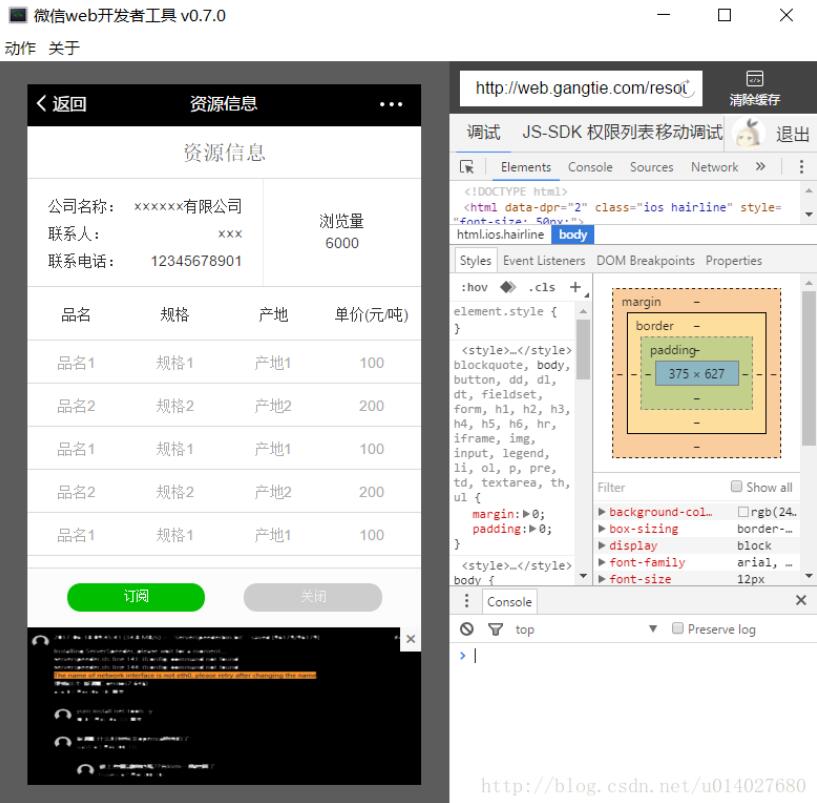
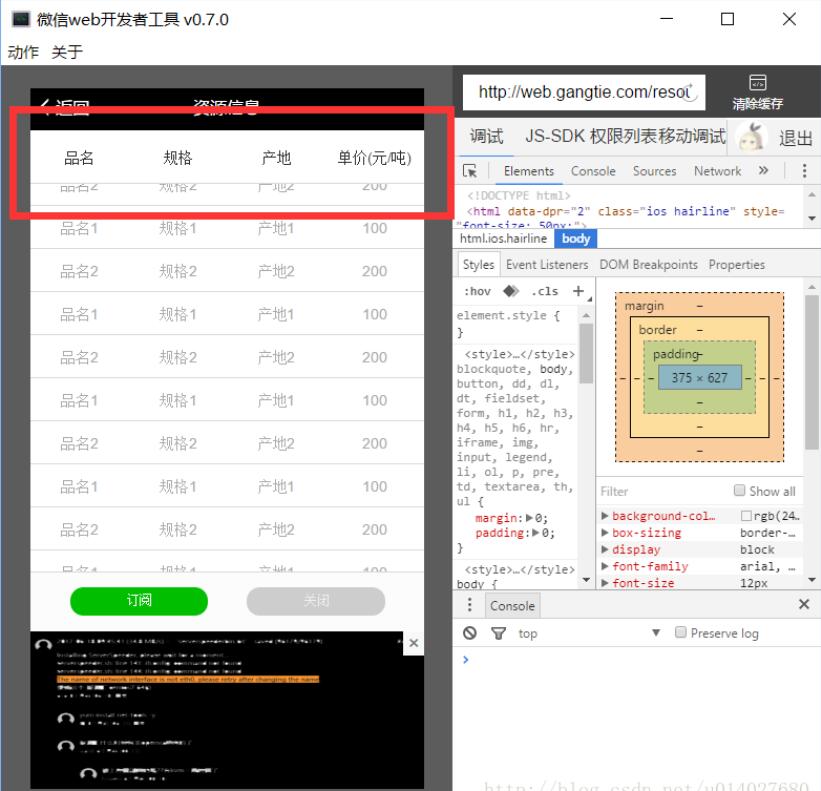
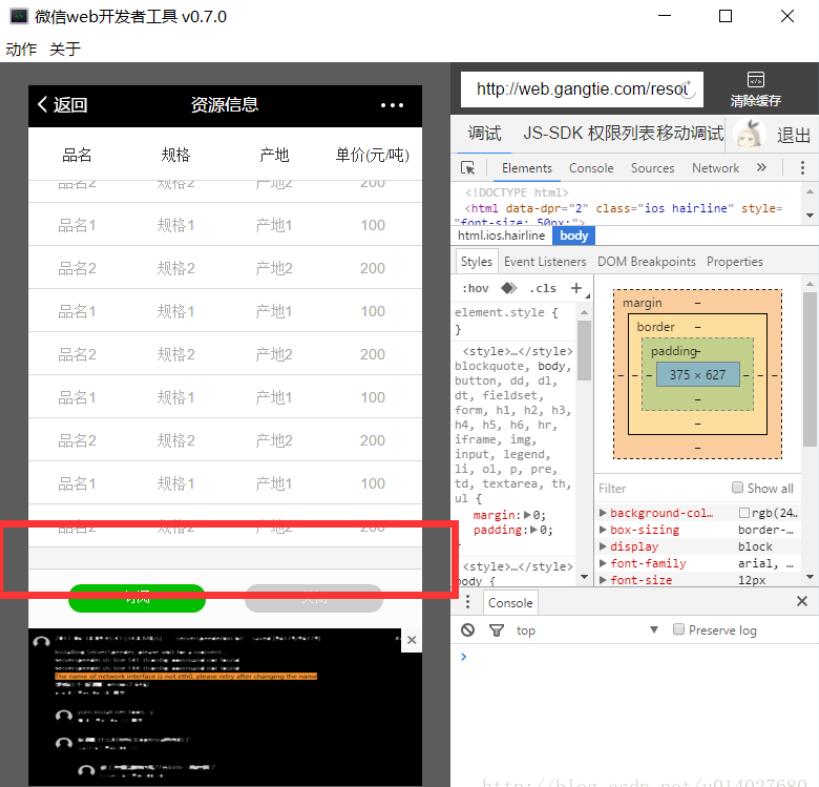
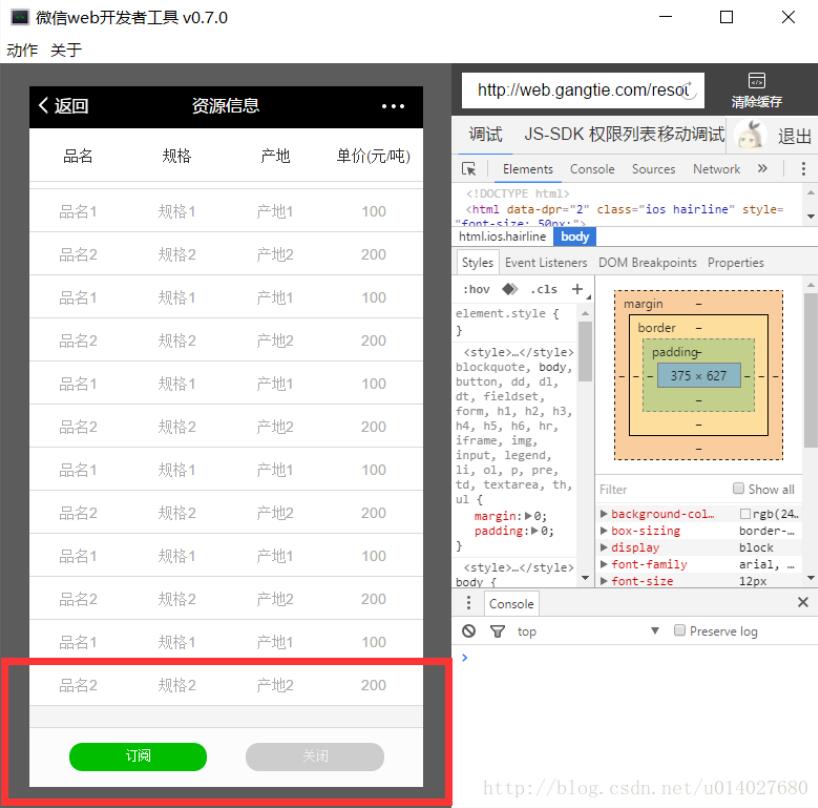
簡略的寫一下html代碼,可以對照文章最后的效果圖看,應該不難理解
<div :>

 <header>資源信息</header>

 <div>
  <!-- 公司信息 瀏覽量 -->
 </div>

 <div id="fixedBar" :class="{ fixedBar: isFixed }">
  <!-- 品名 -->
  <!-- 規格 -->
  <!-- 產地 -->
  <!-- 單價 -->
 </div>

 <div :>
  <!-- 數據列表 -->
 </div>

 <footer class="footer">
  <button>訂閱</button>
  <button>關閉</button>
  <div v-show="advertShow">
   <a @click="del">×</a>
   <img src="./廣告.jpg" />
  </div>
 </footer>

</div>

<style>
 .fixedBar {
  position: fixed;
  top: 0;
  z-index: 999;
  width: 100%;
 }
</style>
VUE
1. data ()
data () {
 paddingBottom: '1.5rem', // 給最外層div一個padding-bottom
 // 因為footer是fixed定位 如果padding-bottom為0 數據列表拉到最下面的時候 會有部分數據被footer擋住

 isFixed: false, // bar浮動
 offsetTop: 0, // 觸發bar浮動的閾值
 marginTop: 0, // 觸發bar浮動的同時 給數據列表一個margin-top 防止列表突然上移 會很突兀

 advertShow: true, // 廣告顯示
}
2. mounted ()
mounted () {
 // 設置初始的 padding-bottom 值為 footer 的高度 +20 防止數據列表拉到最下面被footer擋住 +多少自定
 this.paddingBottom = document.querySelector('.footer').offsetHeight + 20 + 'px';

 // 設置bar浮動閾值為 #fixedBar 至頁面頂部的距離
 this.offsetTop = document.querySelector('#fixedBar').offsetTop;

 // 開啟滾動監聽
 window.addEventListener('scroll', this.handleScroll);
}
3. methods
methods: {
 // 關閉廣告
 del () {
  this.advertShow = true;
  this.$nextTick(() => {
   this.paddingBottom = document.querySelector('.footer').offsetHeight + 20 + 'px';
  });
 },

 // 滾動監聽 滾動觸發的效果寫在這里
 handleScroll () {
  var scrollTop = window.pageYOffset || document.documentElement.scrollTop || document.body.scrollTop;

  if (scrollTop >= this.offsetTop) {
   this.isFixed = true;
   this.marginTop = document.querySelector('#fixedBar').offsetHeight + 'px';
  } else {
   this.isFixed = false;
   this.marginTop = 0;
  }
 }
}
4. destroyed ()
destroyed () {
 window.removeEventListener('scroll', this.handleScroll); // 離開頁面 關閉監聽 不然會報錯
}
效果圖


以上這篇VUE 實現滾動監聽 導航欄置頂的方法就是小編分享給大家的全部內容了,希望能給大家一個參考,也希望大家多多支持億速云。
免責聲明:本站發布的內容(圖片、視頻和文字)以原創、轉載和分享為主,文章觀點不代表本網站立場,如果涉及侵權請聯系站長郵箱:is@yisu.com進行舉報,并提供相關證據,一經查實,將立刻刪除涉嫌侵權內容。