您好,登錄后才能下訂單哦!
您好,登錄后才能下訂單哦!
這篇文章主要介紹了element el-tree組件中動態加載、新增、更新節點的實現方法,具有一定借鑒價值,感興趣的朋友可以參考下,希望大家閱讀完這篇文章之后大有收獲,下面讓小編帶著大家一起了解一下。
最近在根據需求,需要用到樹形控件,ele 的封裝了樹形控件正好拿來用,用的途中遇到一些問題就總結下,哈哈哈
說正事,我需要動態的加載出整個樹形結構,剛好就有

符合需求,啦啦啦
用的時候出現問題了,我要如何把后臺返回個我的數據加載到表里呢,上菜。。。
<template>
	<el-tree
   empty-text="暫無數據"
   :expand-on-click-node="false"
   :props="defaultProps"
   :load="loadNode"
   node-key="id"
   lazy>
   <div class="custom-tree-node" slot-scope="{ node, data }">
    <div class="fl"><i class="el-icon-menu"></i>{{ node.label }}</div>
    <div class="fr">
     <el-button
      type="primary"
      size="mini"
      @click="() => addDialogShow(node, data, 0)">
      新增
     </el-button>
     <el-button
      type="primary"
      plain
      size="mini"
      @click="() => addDialogShow(node, data, 1)">
      更新
     </el-button>
     <!-- <el-button
      disabled
      type="danger"
      size="mini"
      @click="() => remove(node, data)">
      刪除
     </el-button> -->
    </div>
   </div>
  </el-tree>
</template>
el-tree 標準樣式了
部分
<script>
 import { typeList, addtype, updatetype, deltype } from '@/api/baseType'

 export default {
  data() {
   return {
    defaultProps: {
      id: "Id",
      label: 'Name',
      children: 'children'
    },
    //新增相關
    addDialog:false,
    addForm: {},
    addRules:{
     name:[{required: true,message: '請輸入基礎類型名',trigger: 'blur'}]
    },
    pid: null, // 基礎類型得父級id
    flag: null, //操作標志位
    node: {}, // tree 節點對象
    nodedata: {}
   }
  },
  created(){
  },
  methods: {
   // 加載樹結點
   loadNode(node, resolve) {
    // 如果是頂級的父節點
    if (node.level === 0) {
     // 查找頂級對象
     typeList(node.level).then(res => {
      if (res.Data) {
       return resolve(res.Data)
      } else {
       this.$message.error(res.Msg)
      }
     }).catch(() => {
      let data = []
      return resolve(data)
     })
    } else {
     // 根據父節點id找尋下一級的所有節點
     typeList(node.data.Id).then(res => {
      if (res.Data) {
       return resolve(res.Data)
      } else {
       this.$message.error(res.Msg)
      }
     }).catch(() => {
      let data = []
      return resolve(data)
     })
    }
   },
   remove(node, data) {
    console.log(node, data)
    // const parent = node.parent;
    // const children = parent.data.children || parent.data;
    // const index = children.findIndex(d => d.id === data.id);
    // children.splice(index, 1);
   },
   //新增
   addDialogShow(node,data,flag) {
    this.node = node //
    this.nodedata = data
    if(flag === 0) {
     this.addDialog = true
     this.pid = data.Id
     this.flag = 0
    }
    if(flag === 1) {
     this.addDialog = true
     this.pid = data.Id
     this.addForm.name = data.Name
     this.flag = 1
    }
   },
   addSubmit(flag) {
    this.$refs.addForm.validate((valid) => {
     if(valid){
      this.listLoading = true
      let arr = Object.assign({}, this.addForm)
      console.log(flag)
      if(flag === 0) {
       let data = {
        pid: this.pid,
        name: arr.name
       }
       // 新增 api
       addtype(data).then(() => {
        typeList(data.pid).then(res => {
         let id = res.Data[0].Id
         const newChild = { id: id, label: arr.name, children: [] };
         if (!this.nodedata.children) {
          this.$set(nodedata, 'children', []);
         }
         this.nodedata.children.push(newChild)
         this.addDialog = false
         this.$notify.success({
          message:'新增成功',
          duration: 2000
         })
        })
       }).catch(() => {
        this.addDialog = false
       })
      }
      if(flag === 1) {
       let data = {
        name: arr.name
       }
       updatetype(this.pid,data).then(res => {
        this.$set(this.node.data, 'Name',arr.name)
        this.addDialog = false
        this.$notify.success({
         message:'更新成功',
         duration: 2000
        })
       }).catch(() => {
        this.addDialog = false
       })
      }
     }
    })
   }
  }
 }
</script>
動態的加載樹形數據 這里通過對ele 提供的方法
這里對 el-tree 的樣式做了些許的改變
這個看個人需要了
<style lang="less" scoped>
 .el-tree-node__content {
  line-height: 50px;
  .custom-tree-node {
   width: 100%;
   display: block;
   .fl {
    float: left;
    line-height: 31px;
   }
   .fr {
    float: right;
    margin-right: 50px;
   }
  }
 }
</style>
動態加載節點數據,這里通過 ele 提供的loadNode() 方法 可以根據個人需要改寫
這里我是用彈出框進行信息的管理
實現動態的后臺數據更新 和 前臺顯示的刷新,
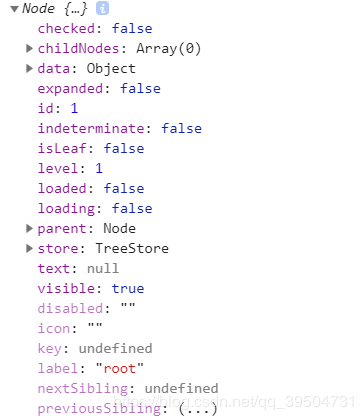
addDialogShow(node,data,flag) {
	this.node = node // 這里對nodetree 進行了預先存儲
  this.nodedata = data
}
然后 在更行后臺api 成功后 通過 Vue.$set() 刷新子節點數據
let arr = Object.assign({}, this.addForm) //獲取輸入框輸入的數據

 updatetype(this.pid,data).then(res => {
   this.$set(this.node.data, 'Name',arr.name) //同步刷新
   this.addDialog = false
   this.$notify.success({
    message:'更新成功',
    duration: 2000
   })
  }).catch(() => {
   this.addDialog = false
  })
 }
感謝你能夠認真閱讀完這篇文章,希望小編分享的“element el-tree組件中動態加載、新增、更新節點的實現方法”這篇文章對大家有幫助,同時也希望大家多多支持億速云,關注億速云行業資訊頻道,更多相關知識等著你來學習!
免責聲明:本站發布的內容(圖片、視頻和文字)以原創、轉載和分享為主,文章觀點不代表本網站立場,如果涉及侵權請聯系站長郵箱:is@yisu.com進行舉報,并提供相關證據,一經查實,將立刻刪除涉嫌侵權內容。