您好,登錄后才能下訂單哦!
您好,登錄后才能下訂單哦!
超鏈接簡單來講就是內容鏈接,通過設置超鏈接可以實現對象與網頁、站點之間的連接。鏈接目標可以是網頁、圖片、郵件地址、文件夾或者是應用程序。設置鏈接的對象可以是文本或者圖片。在下面的示例中,將講述如何通過使用類庫來添加Word超鏈接。同理,我們也可以格式化超鏈接,例如,設置超鏈接文本顏色,下劃線,鏈接地址等,也可以刪除文檔中已經存在的一些超鏈接,例如:頁眉處的鏈接、正文段落中的鏈接、表格中的鏈接、圖片中的鏈接。以上操作我們都可以通過借助下面的類庫來實現。
內容要點:
1.1 添加文本鏈接
步驟 1 :添加using指令
using System;
using Spire.Doc;
using System.Drawing;
using Spire.Doc.Documents;
步驟 2 :創建文檔
//創建一個Document實例并添加section
Document doc = new Document();
Section section = doc.AddSection();
步驟 3:根據需要設置鏈接到不同對象的超鏈接
//添加指向網址的超鏈接
Paragraph para1 = section.AddParagraph();
para1.AppendHyperlink("www.google.com", "www.google.com", HyperlinkType.WebLink);

//添加指向郵件地址的超鏈接
Paragraph para2 = section.AddParagraph();
para2.AppendHyperlink("mailto:support@e-iceblue.com", "support@e-iceblue.com", HyperlinkType.EMailLink);

//添加指向外部文件的超鏈接
Paragraph para3 = section.AddParagraph();
string filePath = @"C:\Users\Administrator\Desktop\2017NobelPrize.docx";
para3.AppendHyperlink(filePath, "點擊打開文檔", HyperlinkType.FileLink);
步驟 4 :設置段間距
para1.Format.AfterSpacing = 15f;
para2.Format.AfterSpacing = 15f;
步驟 5 :保存文件
doc.SaveToFile("文本超鏈接.docx", FileFormat.Docx2013);完成代碼后,調試運行程序,生成穩定,如下所示:
全部代碼如下:
using System;
using Spire.Doc;
using System.Drawing;
using Spire.Doc.Documents;

namespace Insert_Word
{
    class Program
    {
        static void Main(string[] args)
        {
            //創建一個Document實例并添加section
            Document doc = new Document();
            Section section = doc.AddSection();

            //添加指向網址的超鏈接
            Paragraph para1 = section.AddParagraph();
            para1.AppendHyperlink("www.google.com", "www.google.com", HyperlinkType.WebLink);

            //添加指向郵件地址的超鏈接
            Paragraph para2 = section.AddParagraph();
            para2.AppendHyperlink("mailto:support@e-iceblue.com", "support@e-iceblue.com", HyperlinkType.EMailLink);

            //添加指向外部文件的超鏈接
            Paragraph para3 = section.AddParagraph();
            string filePath = @"C:\Users\Administrator\Desktop\2017NobelPrize.docx";
            para3.AppendHyperlink(filePath, "點擊打開文檔", HyperlinkType.FileLink);

            //設置段落之間的間距
            para1.Format.AfterSpacing = 15f;
            para2.Format.AfterSpacing = 15f;
            //保存文檔
            doc.SaveToFile("文本超鏈接.docx", FileFormat.Docx2013);
        }
    }
}
1.2 添加圖片鏈接
步驟 1 :添加using指令
using System;
using Spire.Doc;
using System.Drawing;
using Spire.Doc.Documents;
步驟 2 :創建文檔
Document doc = new Document();
Section section = doc.AddSection();
Paragraph para = section.AddParagraph();
步驟 3 :添加鏈接到圖片
//添加圖片到段落并插入網站鏈接
Image image = Image.FromFile(@"C:\Users\Administrator\Desktop\images\Google.jpg");
Spire.Doc.Fields.DocPicture picture = para.AppendPicture(image);
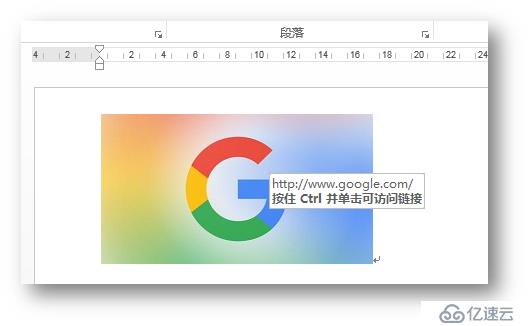
para.AppendHyperlink("www.google.com", picture, HyperlinkType.WebLink);
步驟 4 :保存文檔
doc.SaveToFile("圖片超鏈接.docx", FileFormat.Docx2013);測試效果:
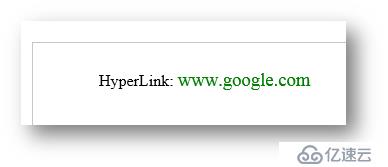
一般情況下,對文本設置超鏈接都是默認的藍色字體,帶有下劃線,在下面的操作中,我們可以自行設置超鏈接的文本字體、字號、顏色、下劃線等。
全部代碼:
using Spire.Doc;
using Spire.Doc.Documents;
using Spire.Doc.Fields;

namespace FormatHyperlink
{
    class Program
    {
        static void Main(string[] args)
        {
            //初始化一個Docuemtn類對象,并添加section
            Document document = new Document();
            Section section = document.AddSection();

            //添加段落,并設置超鏈接文本和鏈接網址。設置字體、字號、字體顏色、下劃線等。
            Paragraph para = section.AddParagraph();
            para.AppendText("HyperLink: ");
            TextRange txtRange = para.AppendHyperlink("www.google.com", "www.google.com", HyperlinkType.WebLink);
            txtRange.CharacterFormat.FontName = "Times New Roman";
            txtRange.CharacterFormat.FontSize = 14;
            txtRange.CharacterFormat.TextColor = System.Drawing.Color.Green;
            txtRange.CharacterFormat.UnderlineStyle = UnderlineStyle.None;
            //保存并打開文檔
            document.SaveToFile("result1.docx", FileFormat.Docx2013);
            System.Diagnostics.Process.Start("result1.docx");
        }
    }
}
測試效果:
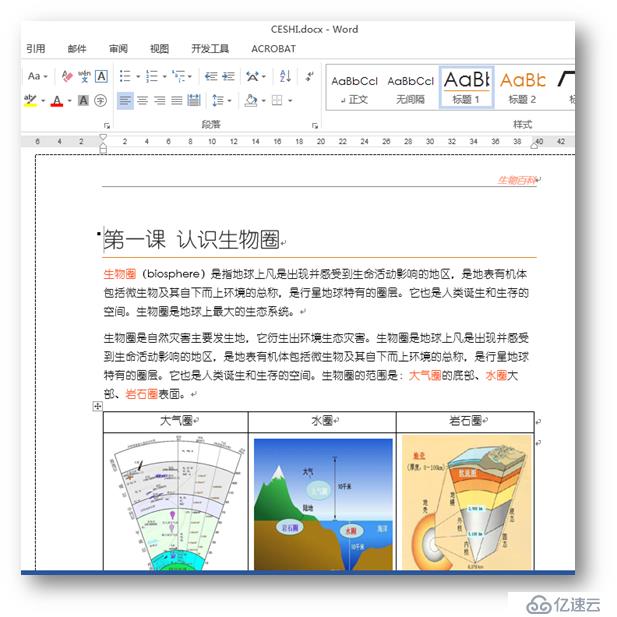
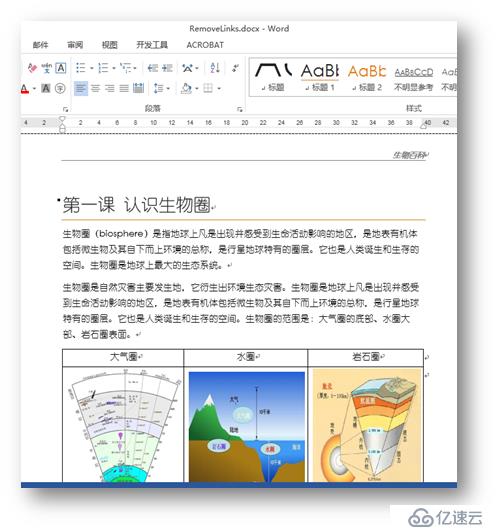
下面的測試文檔中,多處文檔內容包含超鏈接,包括頁眉處的文字超鏈接、正文段落中的文字超鏈接、表格中的圖片超鏈接等,可通過下面的代碼將超鏈接刪除。
測試文檔:
全部代碼步驟:
using Spire.Doc;
using Spire.Doc.Documents;
using Spire.Doc.Fields;
using Spire.Doc.Formatting;
using System.Drawing;

namespace RemoveHyperlink_Doc
{
    class Program
    {
        static void Main(string[] args)
        {
            //創建Word對象并加載文檔
            Document document = new Document();
            document.LoadFromFile(@"C:\Users\Administrator\Desktop\sample.docx");
             //遍歷文檔中所有section
            foreach (Section section in document.Sections)
            {
                //刪除正文里的超鏈接
                foreach (DocumentObject obj in section.Body.ChildObjects)
                {
                    RemoveLinks(obj, document);
                }

                //刪除頁眉頁腳中的超鏈接
                foreach (HeaderFooter hf in section.HeadersFooters)
                {
                    foreach (DocumentObject hfobj in hf.ChildObjects)
                    {
                        RemoveLinks(hfobj, document);
                    }
                }
            }
            //保存文檔
            document.SaveToFile("RemoveLinks.docx", FileFormat.Docx);
            System.Diagnostics.Process.Start("RemoveLinks.docx");
        }
//自定義方法RemoveLinks()刪除段落、表格中的超鏈接
             private static void RemoveLinks(DocumentObject obj,Document document)
            {
                 //刪除段落中的超鏈接
                  RemoveLinksInPara(obj,document);
                 //刪除表格中的超鏈接
                if (obj.DocumentObjectType == DocumentObjectType.Table)
                {
                     foreach (TableRow row in (obj as Table).Rows)
                     {
                         foreach (TableCell cell in row.Cells)
                         {
                             foreach (DocumentObject cobj in cell.ChildObjects)
                            {
                                RemoveLinksInPara(cobj,document);
                            }
                        }
                    }
                }
             }
//自定義方法RemoveLinksInPara()刪除文檔段落中的所有超鏈接
        private static void RemoveLinksInPara(DocumentObject obj,Document document)
         {
            //遍歷文檔段落中所有子對象
             if (obj.DocumentObjectType == DocumentObjectType.Paragraph)
              {
                  var objs = (obj as Paragraph).ChildObjects;
                  for (int i = 0; i < objs.Count; i++)
                  {
                     if (objs[i].DocumentObjectType == DocumentObjectType.Field)
                     {
                      //獲取超鏈接域
                       Field field = objs[i] as Field;
                       if (field.Type == FieldType.FieldHyperlink)
                       {
                           //獲取超鏈接的文本或圖片對象
                           DocumentObject dObj = field.NextSibling.NextSibling as DocumentObject;
                           //刪除文本超鏈接,保留文本和樣式
                           if (dObj is TextRange)
                           {
                               //獲取超鏈接文本樣式
                               CharacterFormat format = (dObj as TextRange).CharacterFormat;
                               format.UnderlineStyle = UnderlineStyle.None;
                               format.TextColor = Color.Black;
                               //創建TextRange并把超鏈接的文本賦予TextRange
                               TextRange tr = new TextRange(document);
                               tr.Text = field.FieldText;
                               //應用樣式
                               tr.ApplyCharacterFormat(format);
                               //刪除文本超鏈接域
                               objs.RemoveAt(i);
                               //重新插入文本
                               objs.Insert(i, tr);
                            }
                              //刪除圖片超鏈接,保留圖片
                              if (dObj is DocPicture)
                              {
                                  //刪除圖片超鏈接域
                                  objs.RemoveAt(i);
                                  //重新插入圖片
                                  objs.Insert(i, dObj);
                              }
                          }
                      }
                  }
              }
         }
    }
}
測試效果:
以上是本次關于“C#操作Word超鏈接的方法”的全部內容。
如需轉載,請注明出處!!
免責聲明:本站發布的內容(圖片、視頻和文字)以原創、轉載和分享為主,文章觀點不代表本網站立場,如果涉及侵權請聯系站長郵箱:is@yisu.com進行舉報,并提供相關證據,一經查實,將立刻刪除涉嫌侵權內容。